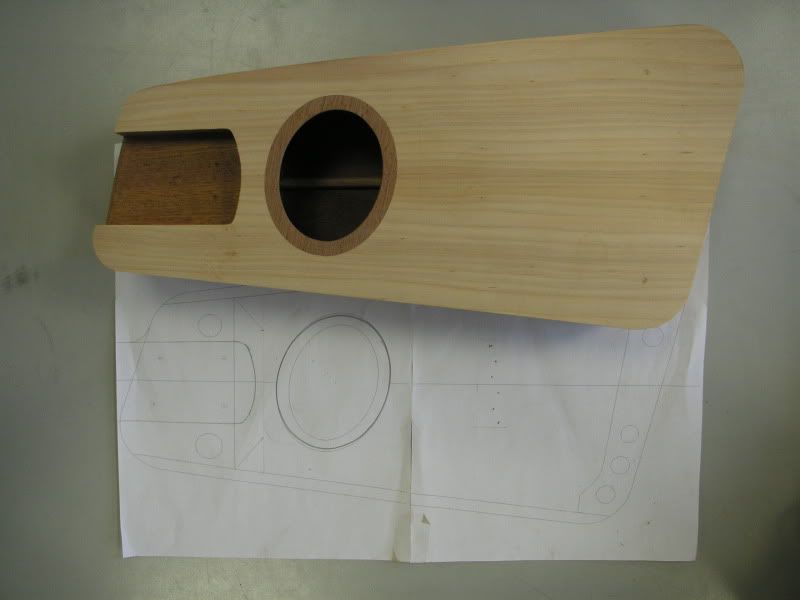
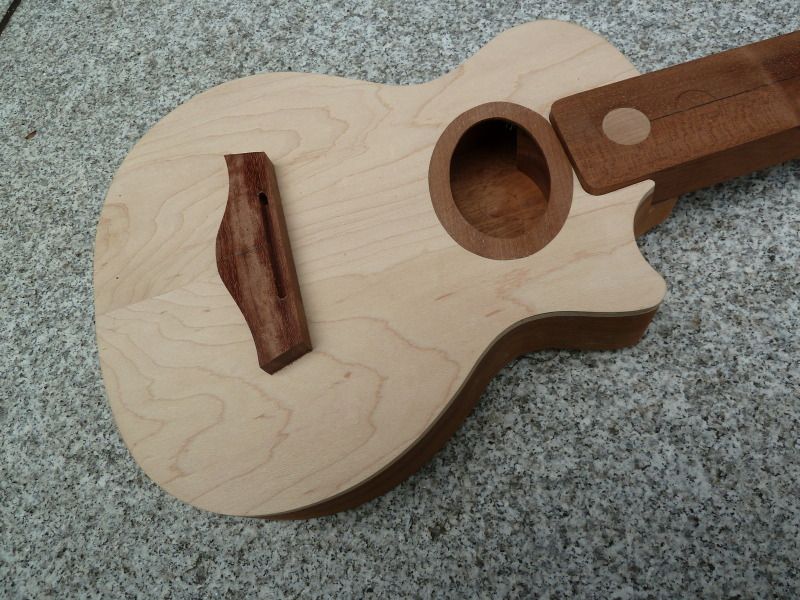
Elliptic soundhole on flat back mandolin
-
Chris Whale
- Posts: 7
- Joined: Sun Feb 12, 2012 6:46 am
- Location: Rochester, UK
Elliptic soundhole on flat back mandolin
Hello, this will be my first mandolin, I am drawing the plans and wish to incorporate an elliptic soundhole and rosette. Can anyone give me any advice on how to cut the hole and cut the rosette channel?
Thanks Chris
Thanks Chris
- Bryan Bear
- Posts: 1390
- Joined: Fri Jan 06, 2012 1:05 pm
- Location: St. Louis, MO
Re: Elliptic soundhole on flat back mandolin
I had to deal with this same issue several months ago. I was in a bit of a hurry and didn't get a chance to figure out how to do it well. I ended up making an oval template to clean up the hole with a lam trimmer, then just bound the hole. I'll be watching this thread with interest!
PMoMC
Take care of your feet and your feet will take care of you.
Take care of your feet and your feet will take care of you.
- Jon Whitney
- Posts: 170
- Joined: Fri Jan 20, 2012 1:04 am
Re: Elliptic soundhole on flat back mandolin
We used to call toys like this: http://www.youtube.com/watch?v=FoO2LIYLPEc bullshit grinders (pardon the crude expression). The handle and various other points on the mechanism describe an ellipse. You could try to make one from wood (a dovetail router bit is useful) and attach a swivel blade at the point that will give the the ellipse you want.
However, if it was me, I'd lay out the ellipse in a CAD program and stick it to the sound board, and cut it out and carefully sand to the line with a drum sander. Like I did on this instrument:
However, if it was me, I'd lay out the ellipse in a CAD program and stick it to the sound board, and cut it out and carefully sand to the line with a drum sander. Like I did on this instrument:
-
Dave Stewart
- Posts: 209
- Joined: Fri Feb 03, 2012 2:25 pm
- Contact:
Re: Elliptic soundhole on flat back mandolin
As John says, you can cut it by transferring a drawing to the soundboard, cutting inside the line (scrollsaw?) & carefully sand to the line, keeping the edge perpendicular to the plane (..a spindle sander?).
For the rosette, lots of good info at Mando cafe (do a search for "rosette" in title).
Here's one
http://www.mandolincafe.com/forum/showt ... ht=rosette
For the rosette, lots of good info at Mando cafe (do a search for "rosette" in title).
Here's one
http://www.mandolincafe.com/forum/showt ... ht=rosette
Dave
Milton, ON
Milton, ON
- Barry Guest
- Posts: 115
- Joined: Sat Jan 07, 2012 10:40 pm
- Location: Sydney, Australia
Re: Elliptic soundhole on flat back mandolin
A pin router is the most accurate way I know. I make my templates out of 1/8" aluminum, and if you spend time to make your template perfect, the end result will be perfect. One template to do both the rosette channel and the sound hole would require four points on the ellipse where material is left in the template. You could make two templates, but then you have another set up to contend with.
Alumnus of Wood and Strings
-
Nicholas Blanton
- Posts: 66
- Joined: Wed Jan 11, 2012 9:52 am
- Location: Shepherdstown, WV, USA
- Contact:
Re: Elliptic soundhole on flat back mandolin
I feel like a Luddite, here, but if you can't access an old geometry textbook you can search under "ellipse + two thumbtacks" and get plenty of hits on how you can draw a pretty decent ellipse with a pencil, loop of string and two pushpins. The push pins hold quite nicely in any softwood soundboard. Figure it out on cardboard, first, to set the loop size and pin spacing, transfer the pin placement with a pair of dividers.
-
Chris Whale
- Posts: 7
- Joined: Sun Feb 12, 2012 6:46 am
- Location: Rochester, UK
Re: Elliptic soundhole on flat back mandolin
Thank you everyone for your suggestions. I have found a method on the internet That I think I might try, using a Dremel and a Dremel tile cutting attachment. Cutting guides of different sizes I could do the sound hole and rosette. Because I'll be making a flat top mandolin this method should work fine.
http://www.grellier.fr/build.php?id=53& ... [slide]/8/
http://www.grellier.fr/build.php?id=53& ... [slide]/8/
- Barry Guest
- Posts: 115
- Joined: Sat Jan 07, 2012 10:40 pm
- Location: Sydney, Australia
Re: Elliptic soundhole on flat back mandolin
With respect Nicholas, I think the question was about how to cut the shape, not about how to draw an ellipse, but I agree, it ain't rocket science.Nicholas Blanton wrote:I feel like a Luddite, here, but if you can't access an old geometry textbook you can search under "ellipse + two thumbtacks" and get plenty of hits on how you can draw a pretty decent ellipse with a pencil, loop of string and two pushpins. The push pins hold quite nicely in any softwood soundboard. Figure it out on cardboard, first, to set the loop size and pin spacing, transfer the pin placement with a pair of dividers.
Alumnus of Wood and Strings
-
Alain Lambert
- Posts: 112
- Joined: Sat Jan 07, 2012 7:18 pm
- Location: Trois-Rivieres, Quebec
Re: Elliptic soundhole on flat back mandolin
I made a larger oval template on a thin plywood and clamp it to the soundboard. Then using different diameter template bushing I cut the rosette and the soundhole.
Lot of calculation to make ( soundhole, rosette, bit diameter, then template bushing diameter for soundhole and rosette, etc.)
Lot of calculation to make ( soundhole, rosette, bit diameter, then template bushing diameter for soundhole and rosette, etc.)
-
Chris Whale
- Posts: 7
- Joined: Sun Feb 12, 2012 6:46 am
- Location: Rochester, UK
Re: Elliptic soundhole on flat back mandolin
Thank you Alain, that looks good, think I will go with your suggestion....may have to delay start, making crib for first grandchild!!
-
Craig Bumgarner
- Posts: 377
- Joined: Mon Jan 09, 2012 3:03 pm
- Location: Drayden, Maryland
Re: Elliptic soundhole on flat back mandolin
I do basically as Alain suggests. I use a 7/16" router bit to make a 7/16" rabbit for the rosette. I use a 5/8" router guide. You can use any combination that works for you, but the bit needs to be the same width as the rabbit you want to cut.
Using CAD, I draw the soundhole ellipse. the inner and outer edges of the rosette and another offset by the difference between the guide and router bit edge (3/32" in my setup). I print this and use spray adhesive to fix it to 1/4" ply wood. Cut out the center portion to the outside line, the router guide edge, and use a spindle sander to sand carefully to the line. Sand the rest by hand, feel for highs and lows. Position and clamp the template to the top and bench. I use a plunge router and dry run the router around the template with the bit up to be sure none of the clamps are in the way (yep, learned the hard way). I start at the top where I usually put a keystone or will be under the fingerboard. Hold router firmly against template, turn on, plunge, route one pass only clockwise around the template, pressing the router firmly against the template throughout. If you make more than one pass, you are likely to track slightly different on the second pass and the rabbit will not be a consistent depth.
If you really mess up and get off the guide, the router can only go toward the sound hole and there is not much wood here after the sound hole is cut out, so use some of the left over top from when the body shape was cut out, match the grain, glue in and hand work the edge. I make all my guitars with oval holes and this method has worked fine many times. The one time I screwed up was when I had a clamp too close and hit it with the router, making a jog in the rabbit, repaired as described above.
-
Chris Whale
- Posts: 7
- Joined: Sun Feb 12, 2012 6:46 am
- Location: Rochester, UK
Re: Elliptic soundhole on flat back mandolin
Thanks Craig (looks great) will definitely be using this approach with my sound hole
-
mike wingate
- Posts: 11
- Joined: Sat Jan 07, 2012 8:05 pm


