

Very cool, Eric!
Any plans to market the binding jig?
If not, I'd really like a Step file of the jig so I can print one!
Dan
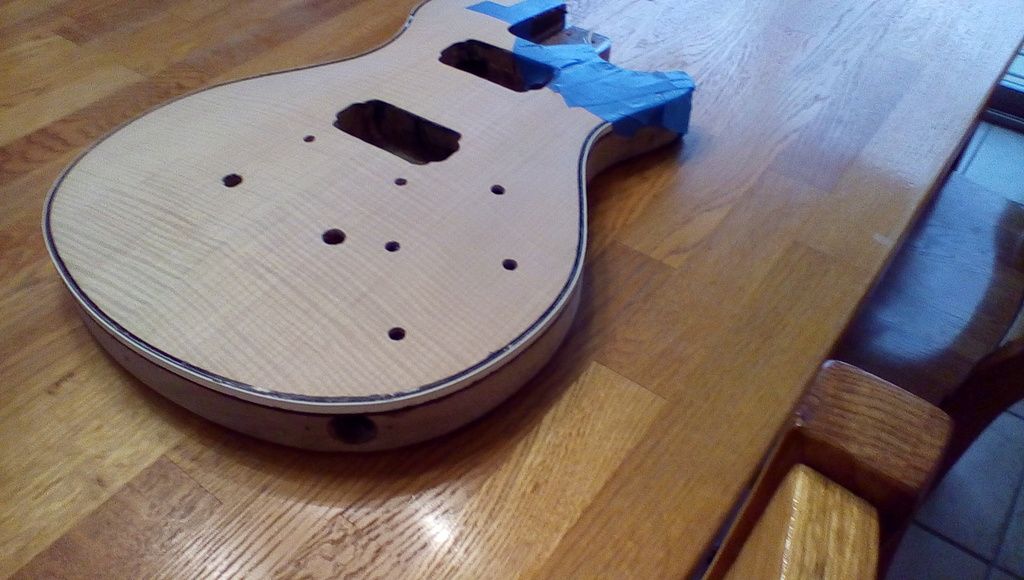
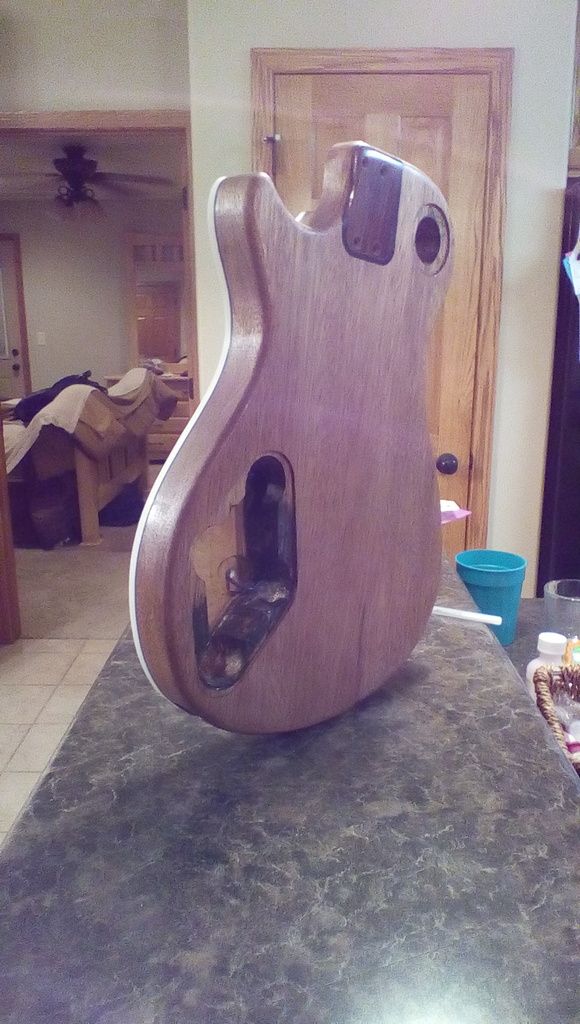
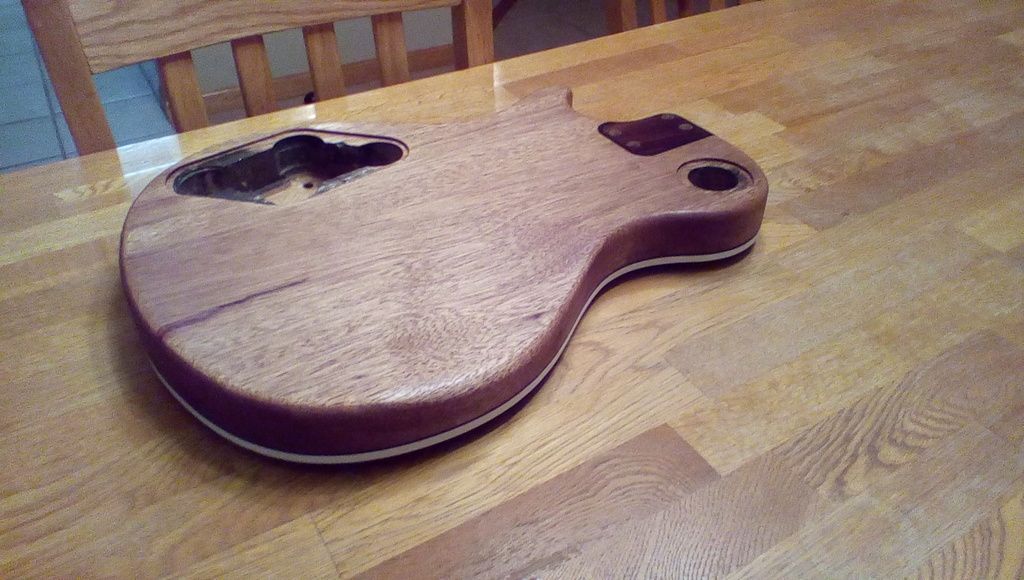
A veneer project. Bolt on LP style.
Re: A veneer project. Bolt on LP style.
Ever-body was kung fu fight-in,
Them kids was fast as light-nin.
Them kids was fast as light-nin.
-
Eric Baack
- Posts: 640
- Joined: Thu Dec 27, 2012 4:28 pm
Re: A veneer project. Bolt on LP style.
I thought about it briefly but not for very long. I made it on solidworks 2015 if you want an editable copy
-
Eric Baack
- Posts: 640
- Joined: Thu Dec 27, 2012 4:28 pm
Re: A veneer project. Bolt on LP style.
I might make up a more machining operation friendly version and see if Stewmac is interested.
-
Eric Baack
- Posts: 640
- Joined: Thu Dec 27, 2012 4:28 pm
Re: A veneer project. Bolt on LP style.
I'll have to take a couple of pictures, I used some shoulder bolts and some springs for the tensioning block.
Re: A veneer project. Bolt on LP style.
Thanks Eric,
I'll hold off while you pursue marketing.
Really neat jig!
Dan
I'll hold off while you pursue marketing.
Really neat jig!
Dan
Ever-body was kung fu fight-in,
Them kids was fast as light-nin.
Them kids was fast as light-nin.
-
Eric Baack
- Posts: 640
- Joined: Thu Dec 27, 2012 4:28 pm
Re: A veneer project. Bolt on LP style.
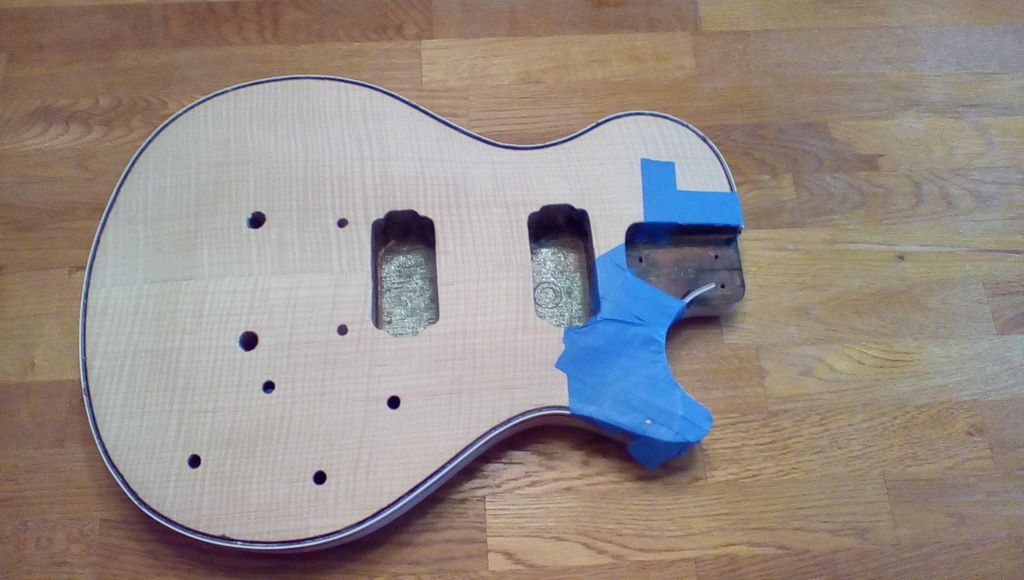
Here it is with some binding


-
Eric Baack
- Posts: 640
- Joined: Thu Dec 27, 2012 4:28 pm
Re: A veneer project. Bolt on LP style.
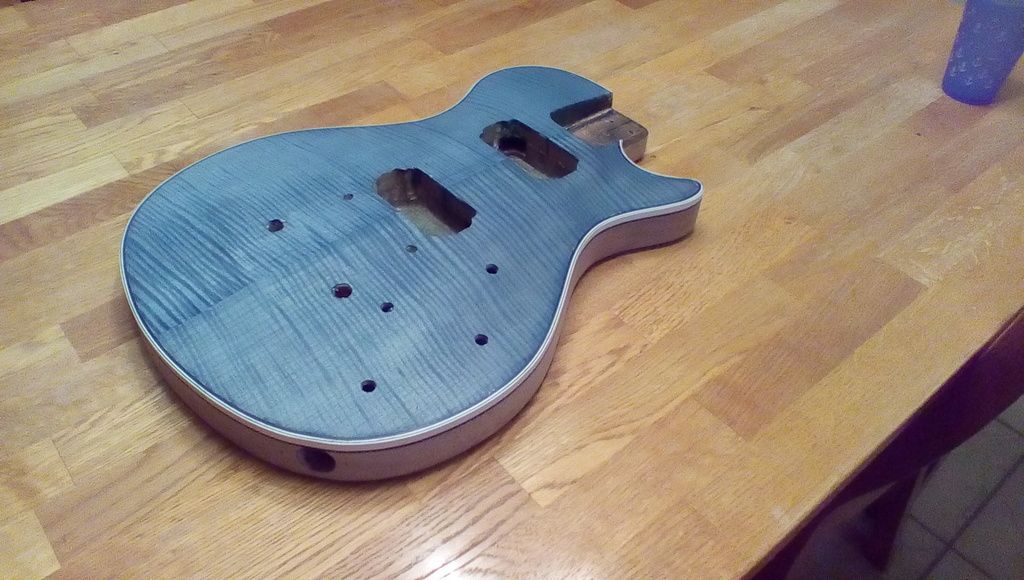
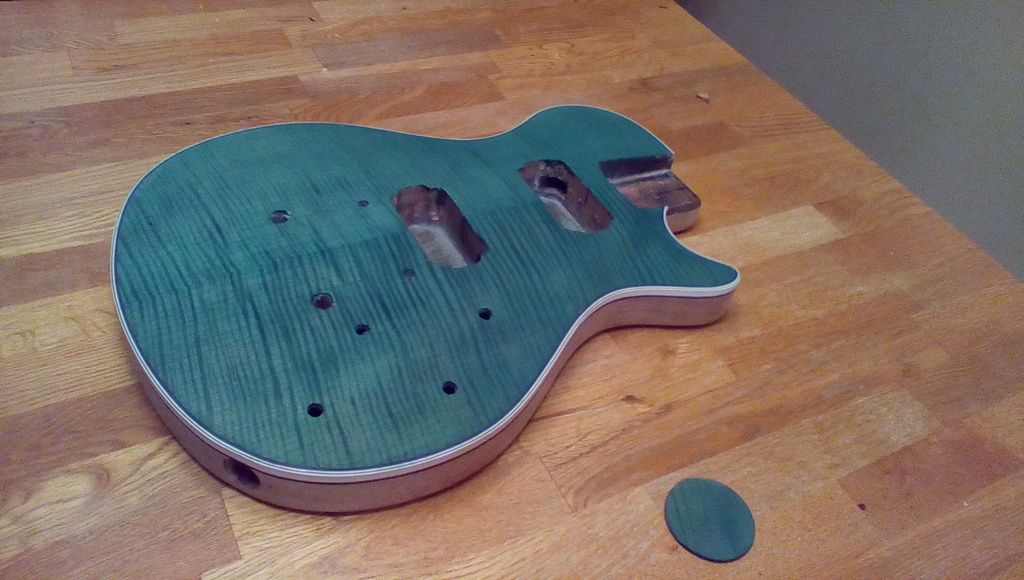
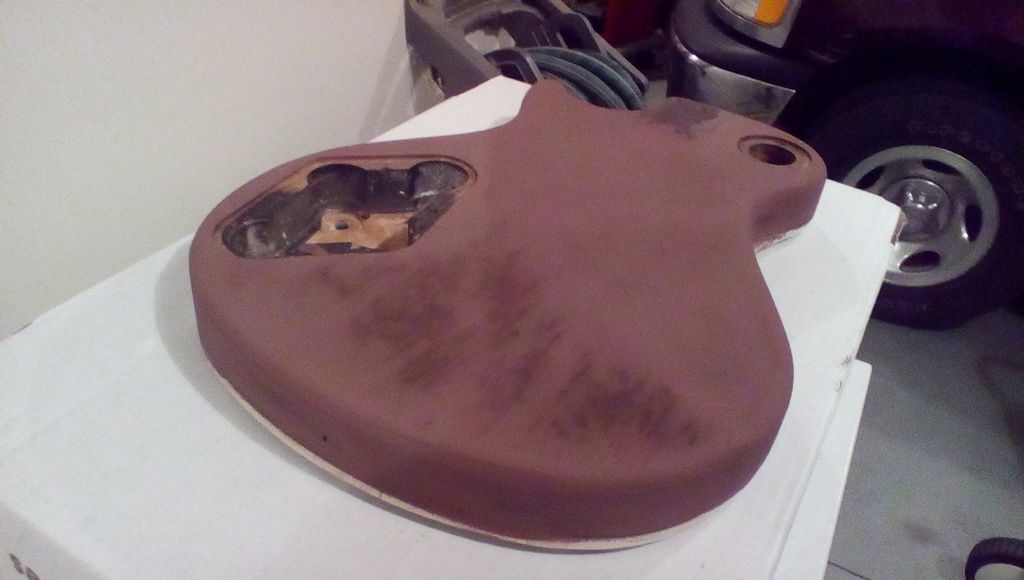
Here's the first step of dye. I will sand this back and add a coat of teal for a blue green finish


Re: A veneer project. Bolt on LP style.
Looking really nice Eric!
Ever-body was kung fu fight-in,
Them kids was fast as light-nin.
Them kids was fast as light-nin.
-
Eric Baack
- Posts: 640
- Joined: Thu Dec 27, 2012 4:28 pm
Re: A veneer project. Bolt on LP style.
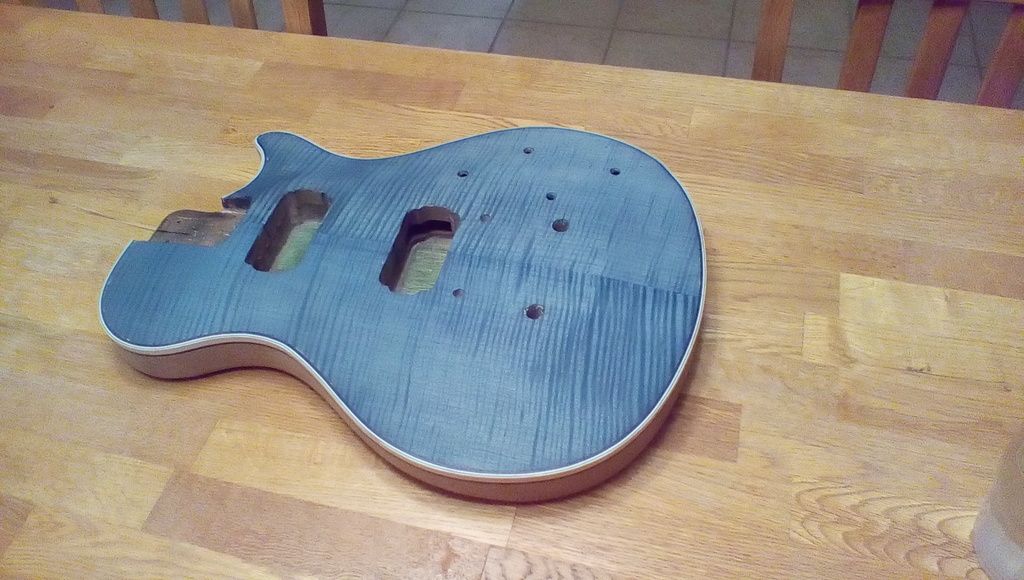
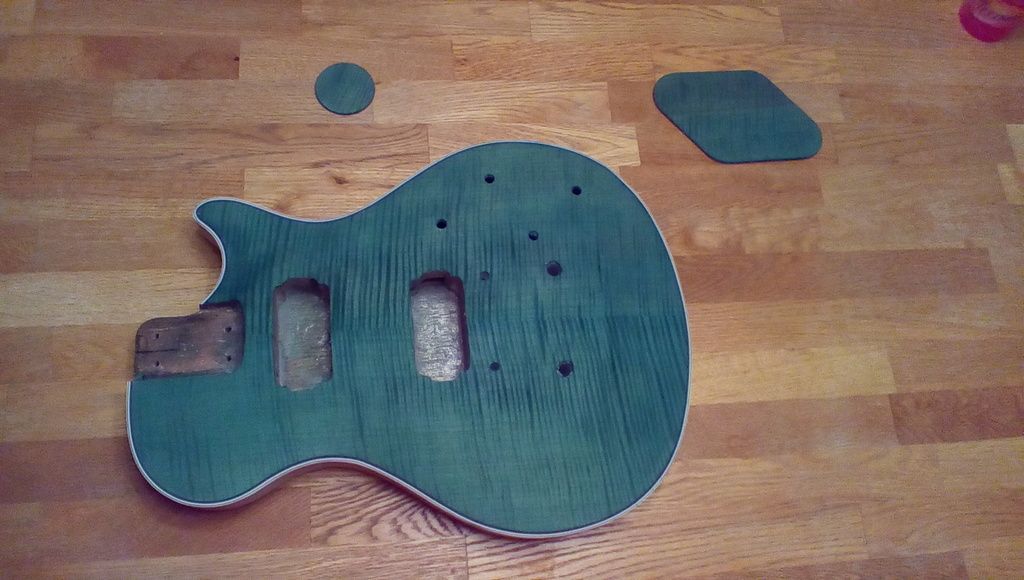
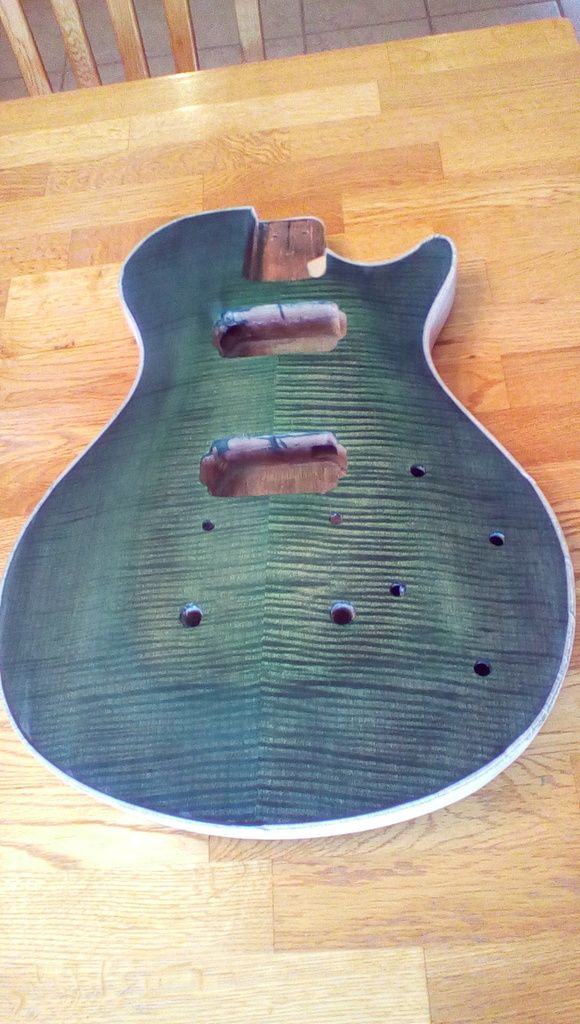
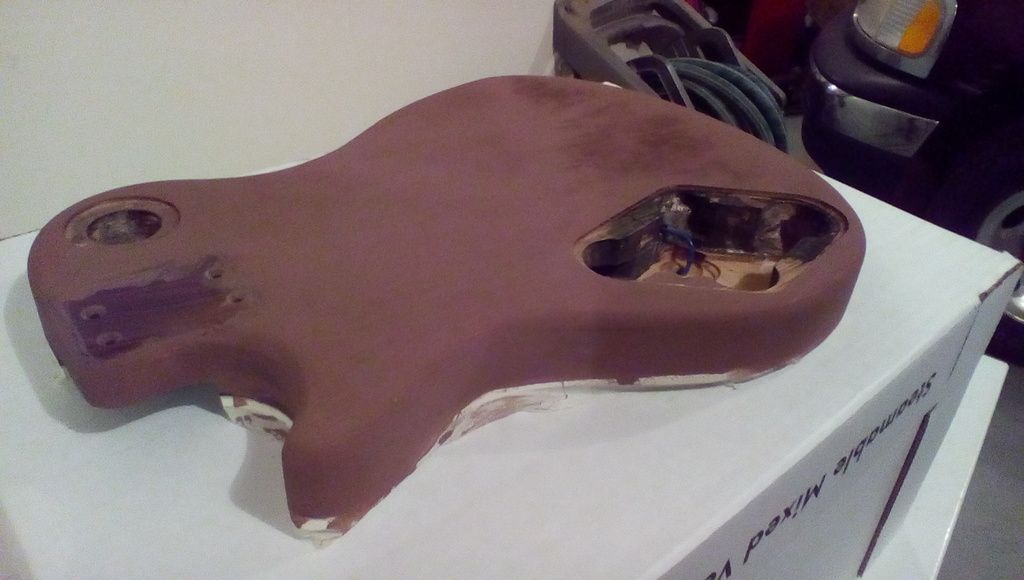
Second coat was a bit darker than I envisioned but I like it. Should have made the green dye a bit thinner.


-
Eric Baack
- Posts: 640
- Joined: Thu Dec 27, 2012 4:28 pm
Re: A veneer project. Bolt on LP style.
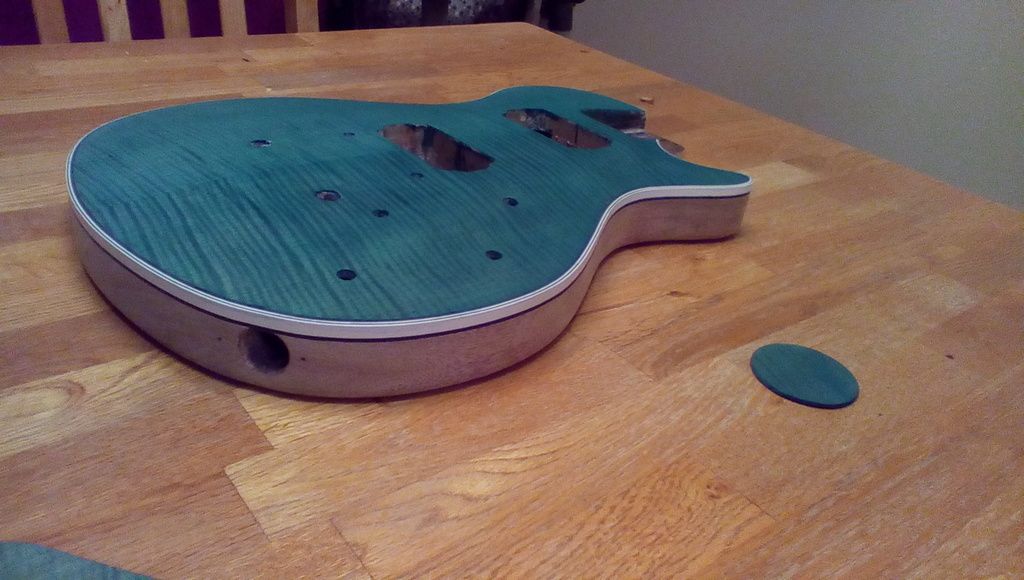
An attempt at a blue fade to green. First to get rid of some of the green around the edges.
Then to apply the blue and blend it in.
Me likely!!!!
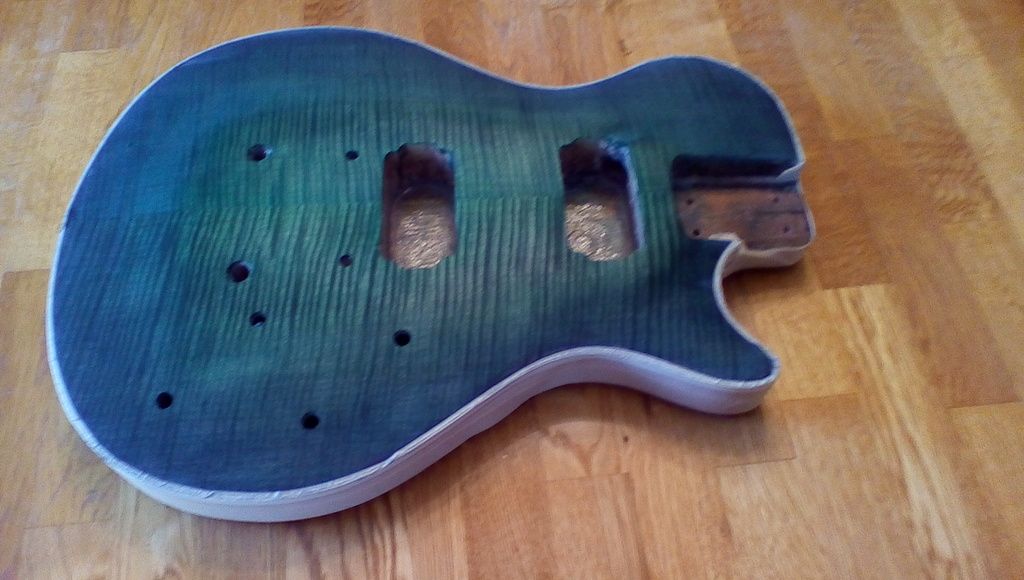

Then to apply the blue and blend it in.
Me likely!!!!


-
Eric Baack
- Posts: 640
- Joined: Thu Dec 27, 2012 4:28 pm
Re: A veneer project. Bolt on LP style.
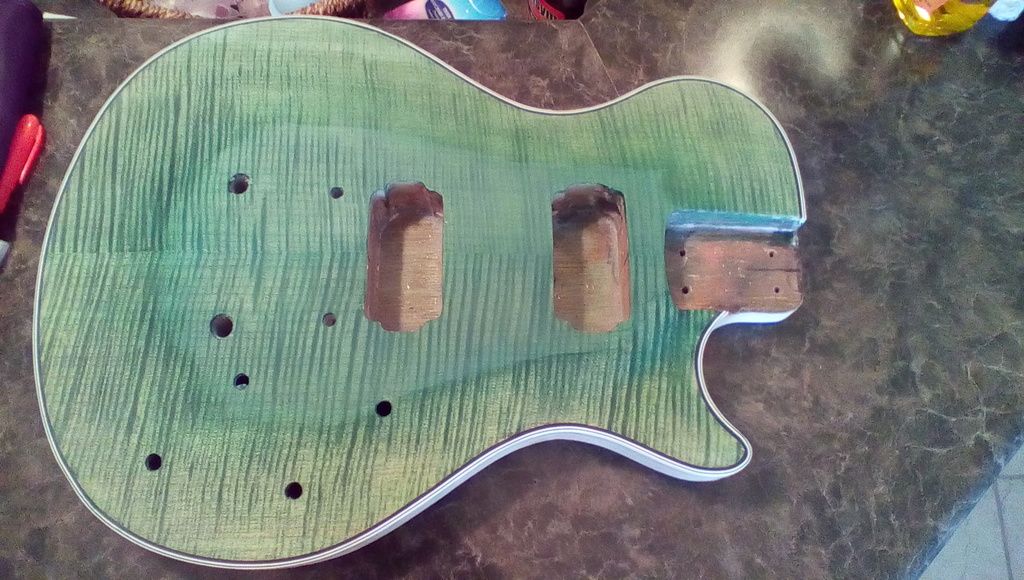
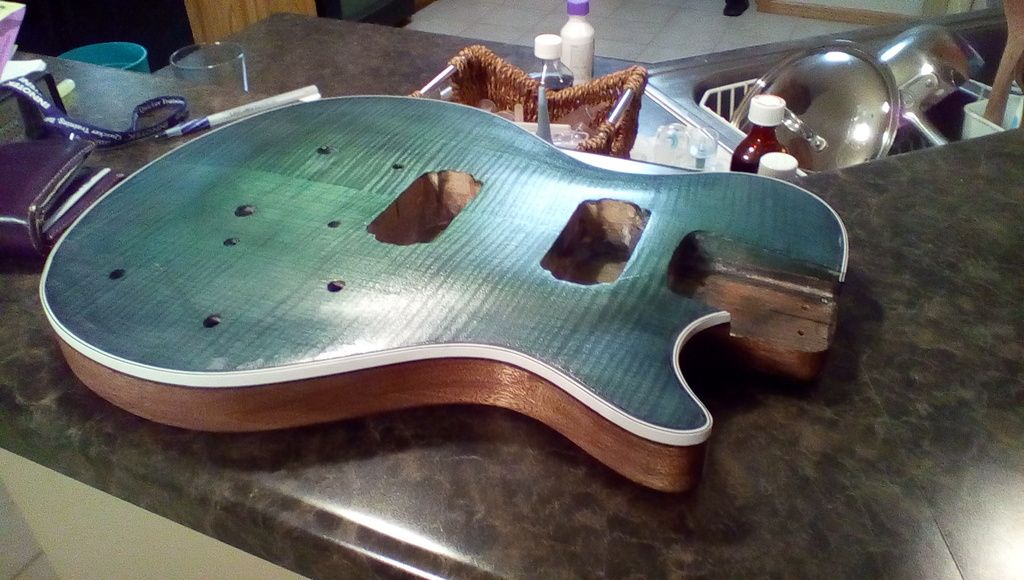
Some clear shellac on the back to seal it up. Now to fill the pores!!


Re: A veneer project. Bolt on LP style.
Nice Eric!
I did a similar blue/green color scheme.
By warned that blue dye will fade when exposed to sunlight, so don't hang it in direct light.
Dan
I did a similar blue/green color scheme.
By warned that blue dye will fade when exposed to sunlight, so don't hang it in direct light.
Dan
- Attachments
-
Ever-body was kung fu fight-in,
Them kids was fast as light-nin.
Them kids was fast as light-nin.
-
Eric Baack
- Posts: 640
- Joined: Thu Dec 27, 2012 4:28 pm
Re: A veneer project. Bolt on LP style.
good to know! thanks!
-
Art Davila
- Posts: 292
- Joined: Wed Jan 23, 2013 12:07 am
- Location: Chicago, Il U.S.A.
Re: A veneer project. Bolt on LP style.
Are there uv blocker poly finishes to help with the fading?
I have a lot of experience on how "not" to do things.
-
Eric Baack
- Posts: 640
- Joined: Thu Dec 27, 2012 4:28 pm
Re: A veneer project. Bolt on LP style.
I'm planning on an automotive grade 2 part urethane called Spraymax 2K. It is a 2 part urethane in a can. Push the button on the bottom and shake it to mix. Then you have 18-24 hours to use it. I do all of my coats on the guitar within a couple of hours.
Give it a light coat
wait 15 minutes for it to tack up
apply a heavier coat
another 15 minutes
final coat
It is some nice stuff
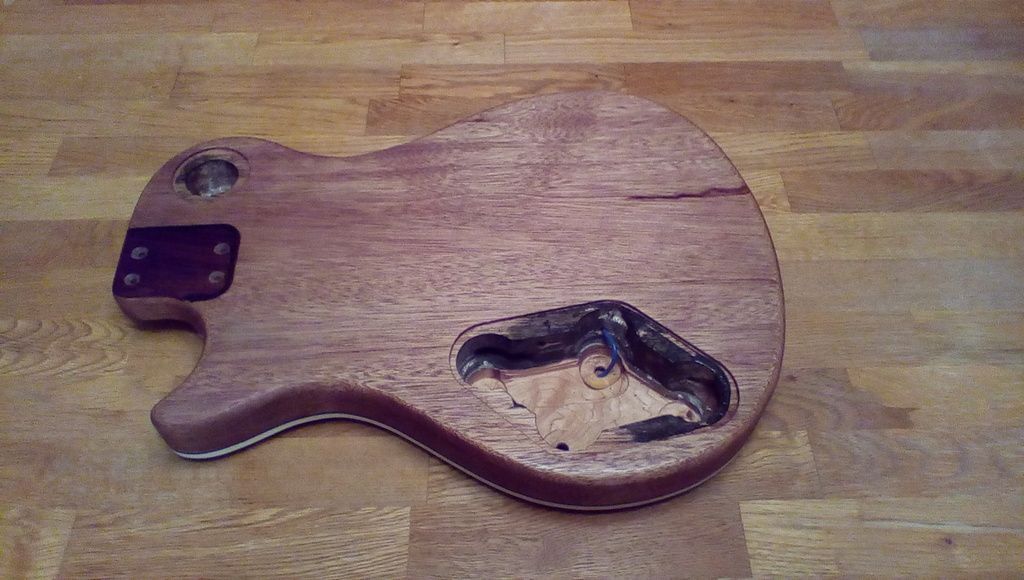
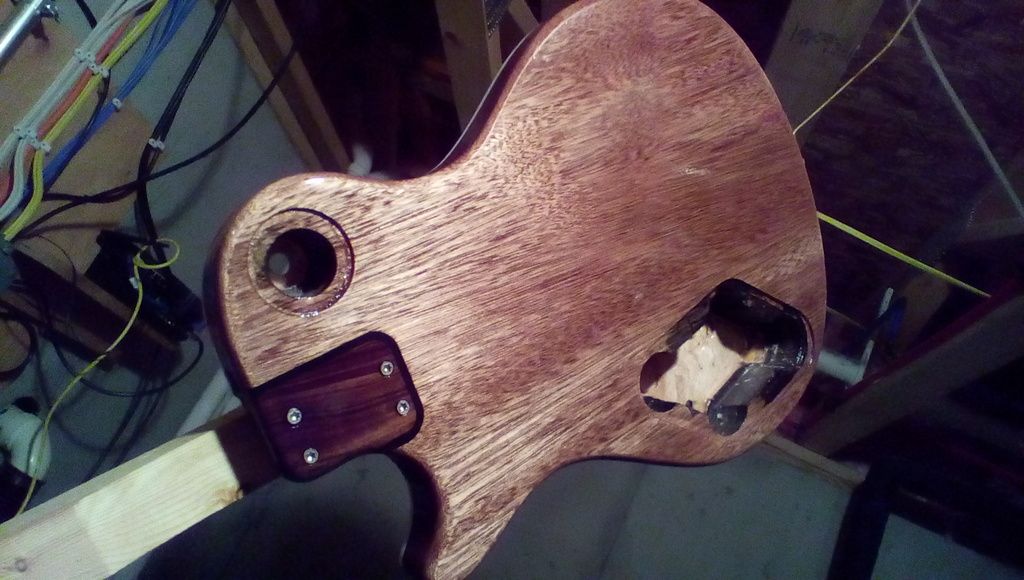
First coat of filler is on the back. Hopefully this one takes care of it, but I'm guessing I'll need to do another. I brush on some shellac between filler treatments to lock it in.
Give it a light coat
wait 15 minutes for it to tack up
apply a heavier coat
another 15 minutes
final coat
It is some nice stuff
First coat of filler is on the back. Hopefully this one takes care of it, but I'm guessing I'll need to do another. I brush on some shellac between filler treatments to lock it in.


-
Eric Baack
- Posts: 640
- Joined: Thu Dec 27, 2012 4:28 pm
Re: A veneer project. Bolt on LP style.
I'm about ready to shoot the final clear. I should take a picture or 2 first. I ended up leveling the rest of it off with a heavier set of shellac coats sprayed on and then sanding it back down quite a ways. The finish is leveled out nicely and I need to do a bit of work on the cavity covers before I spray the clear so that they can get sprayed at the same time. I need to take .03" off of the overall thickness on the inside of the control cavity cover and drill out the screw holes in both covers.
-
Eric Baack
- Posts: 640
- Joined: Thu Dec 27, 2012 4:28 pm
Re: A veneer project. Bolt on LP style.
I sprayed the clear over the weekend and wet sanded it. There are a couple of spots that need touch up so I'll be practicing with my new airbrush some. I was also reminded to seal up any holes drilled before wet sanding as it wicked in under the finish and the wood expanded a bit so I'll be waiting for a little bit before I press my bridge hardware in for that to dry out a bit. I might have to press it down some too.
Here are some pictures prior to wet sanding though...
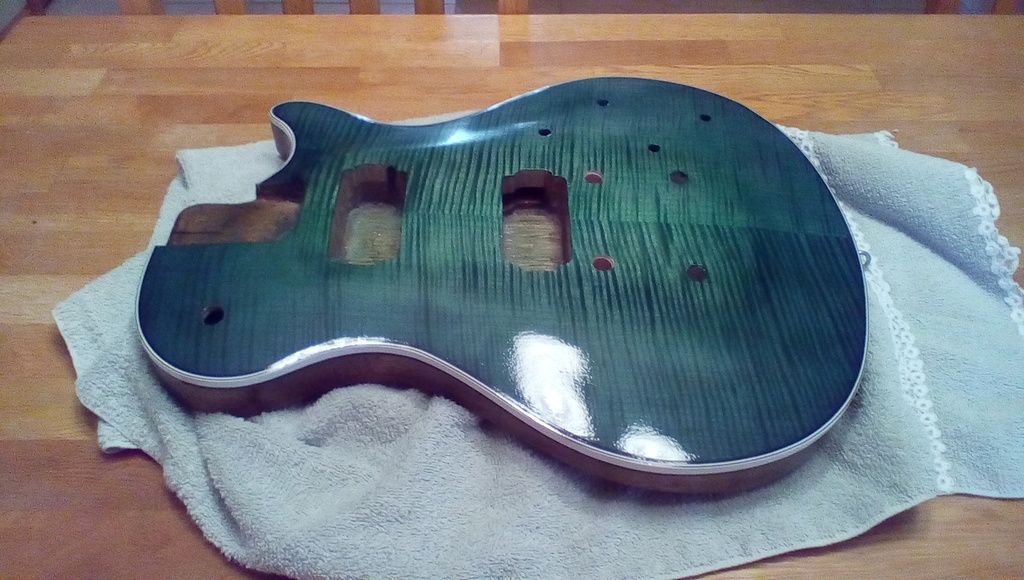

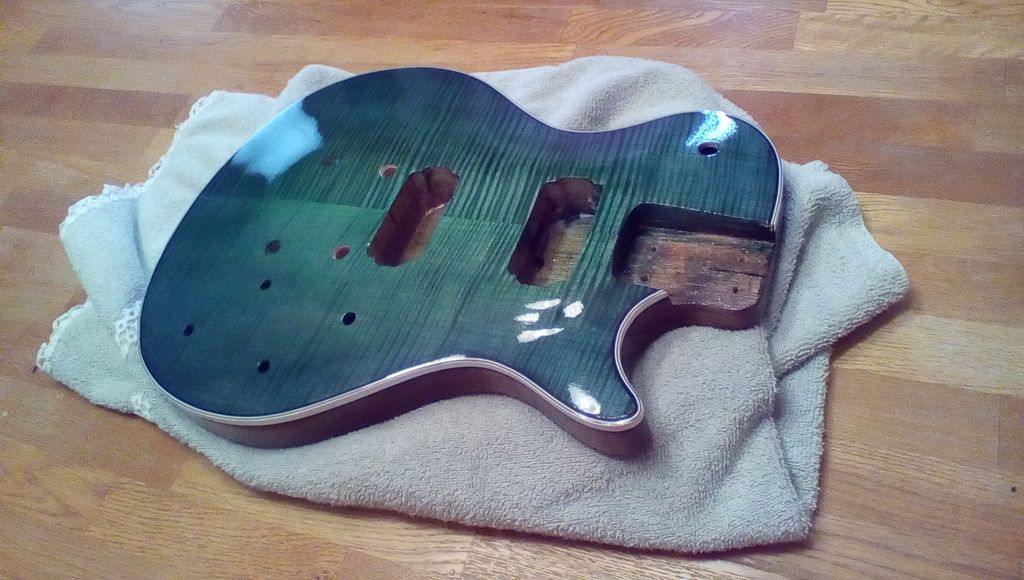
Here are some pictures prior to wet sanding though...


-
Eric Baack
- Posts: 640
- Joined: Thu Dec 27, 2012 4:28 pm
Re: A veneer project. Bolt on LP style.
Going to get 3P4T rotary switches instead of the 4P3T. No parallel/series switching but I will have a north tap and south tap on both pickups. The neck will also get a single coil out of phase and the bridge will get a humbucker out of phase. Both will have standard series humbucker in position 1 of the switches. The wiring should actually be pretty clean and I'm adding some small molex connectors so that I can swap things out easily.
-
Eric Baack
- Posts: 640
- Joined: Thu Dec 27, 2012 4:28 pm
Re: A veneer project. Bolt on LP style.
so I learned last night that trying to fill up fisheye spots with superglue and not having a fine enough tip to do so is a bad idea!!
Oh well, I'll let it sit for a few weeks and see if those spots around the bridge post holes where the wood swelled will go down. I'll be sealing those with shellac before the next round of wet sanding!!!
at least I'm learning some lessons on this one.
Time to break out the sander and another can of clear!
-
Eric Baack
- Posts: 640
- Joined: Thu Dec 27, 2012 4:28 pm
Re: A veneer project. Bolt on LP style.
After sitting for over a week, the swelling has gone down about all of the way and I am levelling the surface with some CA glue before I re-spray the clear. I'm going to try do do a better job of leveling the surface first this time as well. If I don't screw it up, this should be a very nice looking guitar when I'm done.