Opaque Lacquer - created 06-21-2009
Birko, Andy - 06/21/2009.08:30:42
Bandura Butcher
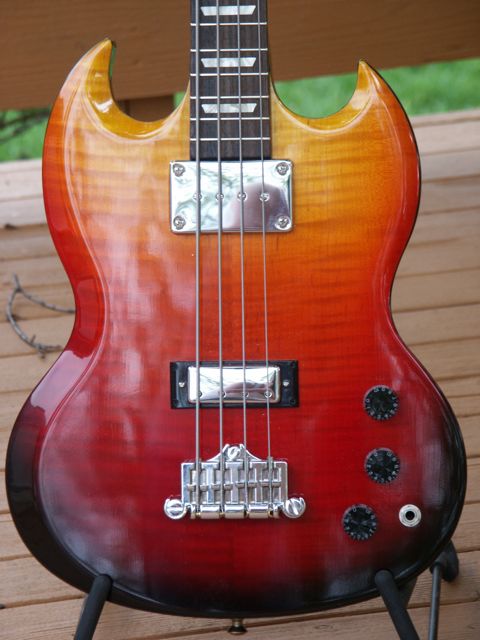
I need to do a sunburst on my next bandura. I'd like to do something similar to the bass pictured below, just that the transition from black to yellow will happen in just a few inches rather than the whole instrument. I've made some color samples and think I have some good ideas for the red and yellow but I have a question about the opaque black.
I was hoping that just adding black to my red would make it dark enough to seem opaque. Looking at my color samples, that's not the case. Adding black dye tended to push the color to brown rather than darker red. Do I need to buy a pigment to create an opaque black, or will a dark red with a few coats of color be black enough. I need it to be pretty dark to hide some repairs.
I'm planning on spraying the color in Target USL over shellac though I could spray the color in shellac as well. My dyes are Transtint. Thanks.
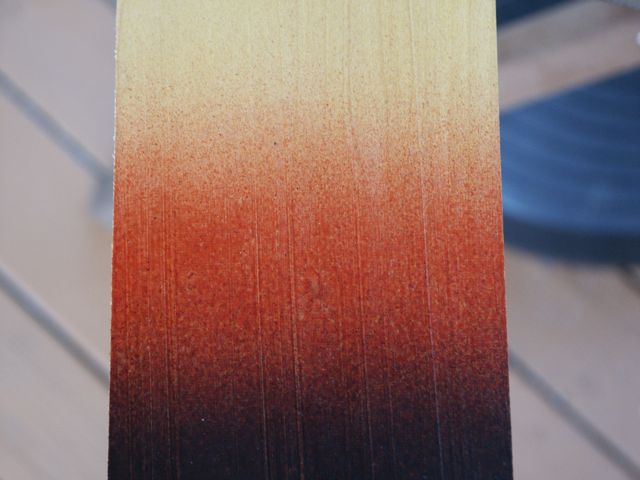
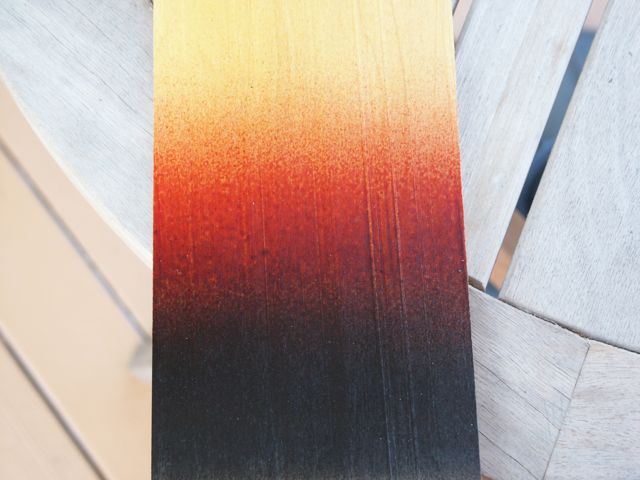
Color samples. Note that as I add black to the red mixes, the color tends to brown rather than darker red. Any thoughts?

Andy, did you shoot that picture? If not, you can't post the image here because of copyright concerns.
I took that picture this morning in my back yard. I own the copyright.
Adding black to red will never get to black, just a dark red brown color. Use straight black for that area.
It really helps the black blend in better if you spray the black on right after the amber, and before the red. Spray the red over the black.
Mark, thanks for the tip. Will the black dye be enough or should I look for an opaque pigment such as the TransFast pigments here?
I can't answer that. I only have experience with aniline dyes, and also the answer you are looking for will depend on how big the "repair" you mentioned is, and how much coverage you want.
If it were me, I'd use a deep transparent tint, even if I could see the repair through it. If the color is deep enough it will still be hard to spot, and a more opaque tint will look noticable and not as nice on the rest of the instrument.
Color or tint the repaired area as best as you can
before
you put any of the finish on. If you can match the repaired spot in color as closely as you can before you start the bursting process, the better it will blend in under the colors.
If you really want to get an opaque finish (even partial) it will be much easier with the pigments. I've used the color tone pigments from Stew-Mac for WB (with USL) and gotten pretty good results. If you only want partial opaqueness (or gradiated) be careful when adding the pigment, a little goes a long way.
I would also recommend not using the pigments. You can get the finish pretty opaque with the dyes, and it should easily hide the repair without totally obscuring the wood grain.
Sounds like it's time for another test board. I've ordered a black pigment which should be here within a day or two. I'll try both and post back with the results in case anyone's interested.
I've just finished a sunburst with good results. And, like yourself, the burst had to cover up a repair. I used a black pigment for the very edge where the repair was, and then transitioned to an "Aged Natural Cherry" dye. Along the lines of Mark's suggestion, I also put the black pigment down first (after sealer coats and three coats of lacquer, leveled), and the then the transition colour (dye) on top, followed by clear coats. It worked out pretty well. The repair is invisible under the pigment. I got my pigments and dyes from Wood Essence.
One more question to you experts - are you letting the various color coats dry before you start the next one or are you trying to switch colors quickly to help them blend together? Or is it really a non issue?
I have the stew mac video on sunbursts and don't think the point comes up either way - I'll have to re-watch it.
I don't think it matters much. Just obey the regular rules of applying any lacquer, and don't lay it on too thick before the lower coats can dry.
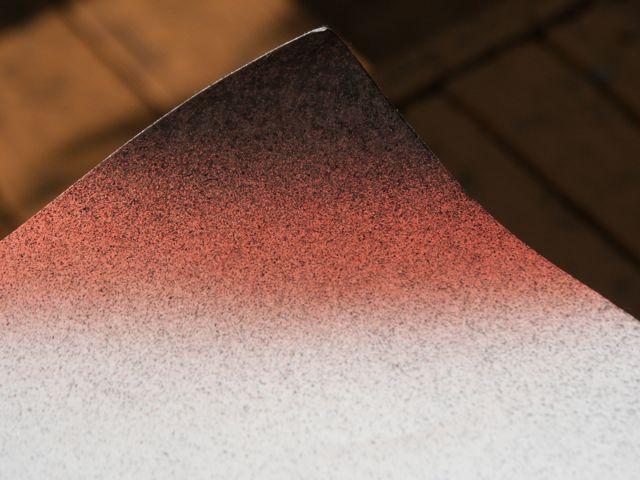
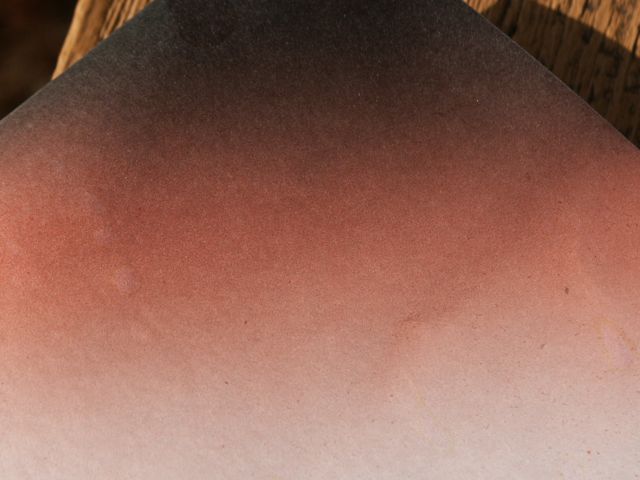
Ok, so here's a couple of test sprays I did. Overall, there's not really that much difference between the opaque black and the black tint at the end of the day. in the cup, the black pigment is like, super black. like, there could be none more black.
However, I'm really not pleased with the atomization of my HVLP gun. I love the fact that it doesn't overspray so much but I'm thinking I should switch to my old school siphon feed for the burt colors.
I was spraying at about 30psi at the inlet (up from 25) with the air screw just cracked. Needle also just cracked and fan set to nothing. I suppose I should have tried upping the pressure to see if it helped.
I also think that my red and perhaps black are too dark and should dilute them by 50% so that I'm spraying less color with each coat. Will this even work with black? I think I recall Mark S. recommending that a long time ago. I don't want to build my color coats too thick though.
So, comments on my plan please:
*Switch to HPLV gun (high pressure old school gun) for black and red
*Thin black and red by 50% (i.e. add equal amount of lacquer to current mix)
*Use more coats of black and red to achieve depth of color
I'm open to trying the HVLP gun again if someone can dial me in over the internet but I'm kind of on a self imposed deadline and want the thing hanging to cure with clear coats by July 3
This first pic is the black tint:
Here's the black pigment. I shot these pics at dusk and the colors aren't well represented. And by not happy with the atomization I should say, it sucks.
Sorry, here's the black pigment
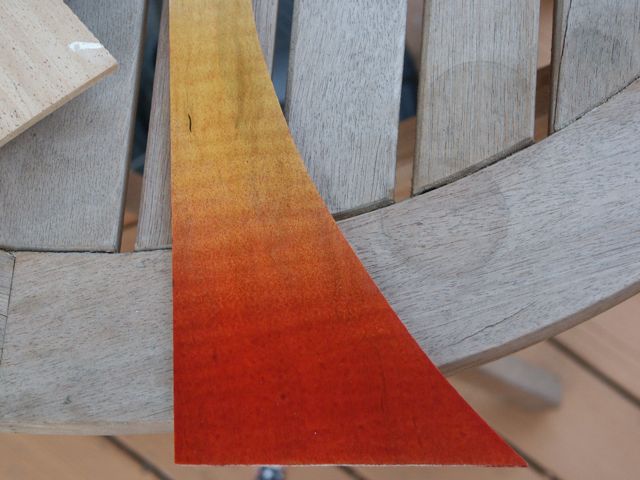
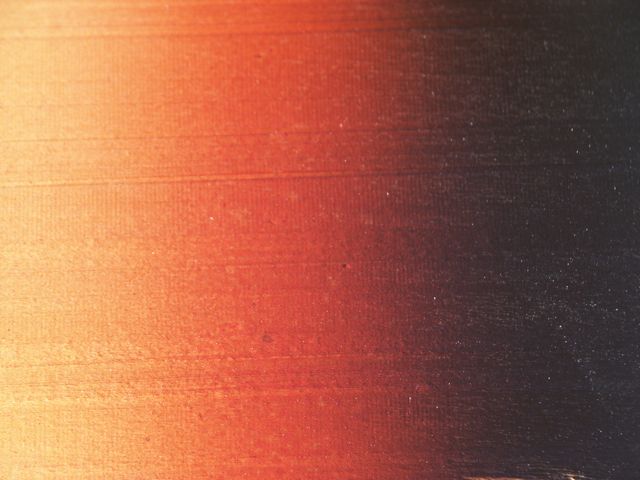
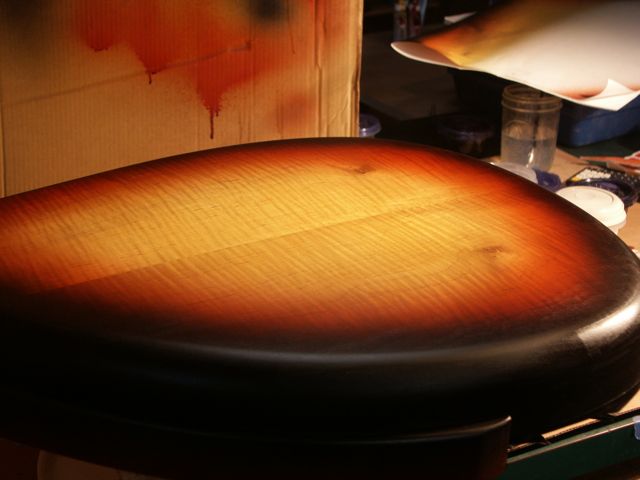
And finally here's a shot from the scrap of the actual wood I used for the back. I first wiped with shellac that had about 3 drops of red in one ounce of roughly 1lb cut shellac. After it dried I sanded and re wiped on shellac with no red in it then sprayed on top. The idea was to pop the curl a little bit and it seems to have worked. I forgot to spray the black on this piece and although not as sucky, the atomization still sucks.
I also think that my red and perhaps black are too dark and should dilute them by 50% so that I'm spraying less color with each coat.
Indeed I did say that, and I thought it again when I saw your photos! You need to spray a more diluted mix. Have the colors mixed in thinner, so they take longer to build. You won't get too much finish build if you don't put much clear in there. go thin on that, too. It'll take you a little bit to get your mix of color/clear finish/thinner right, but when you do, the colors will take a few coats to build well, and you won't get your desired depth of color until you have put down a few coats.
Remember when you are doing this that your material will be thinner, and will probably run easier, so don't give in to the temptation to keep spraying to deepen the color! If you put it on too thick, you'll have a run and that will ruin everything. Deepen the color by letting each coat set well, then hit it again, until your color starts to develop.
Hey Andy,
I know the photo's aren't great, and yes, does look as though the atomization sucks, but from what I can see, the pigment looks better than the dye. It just looks more, well, BLACK. Whereas the the dye sorta transitions from red to brown to black, like your first tests. The pigment looks more like red, darker red, black.
Just my $0.02.
Looks like your getting spitting instead of atomization. You should play with the gun some until you get it dialed in. I'm sure you can get much better results than that with your HVLP.
I think you're forcing too much finish through the gun. I would try spreading the fan out a little and/or turning the fluid control valve in some.
Greg - little secret. In the one with the pigment, I shot the amber first, then the black pigment, then the black dye, then the red. I think I will use the pigment at the "none more black areas".
Barry, I must admit that I don't understand how to use my HVLP yet. I'll give it one more shot so to speak (practicing on paper) before I give up.
One question, I bought a gun with 0.8mm, 1mm and 1.2mm tip. the 1.2 worked great for applying the clear on my last build and I figured that the 0.8mm would be perfect for bursting.
When I inserted the tip, I noticed two things: first that the needle on the .8 extends past the tip of the er, um..tip. I figured that was to allow more throttling of finish. Second thing was that at part throttle, the needle doesn't ride in the center of the orifice (see pic). Could this be part of the problem? the 1mm and 1.2mm don't seem to have this problem but it's much harder to tell because the end of the needle doesn't extend beyond the end of the nozzle.
p.s. edit: And a big round of applause please for my lovely and talented wife/hand model
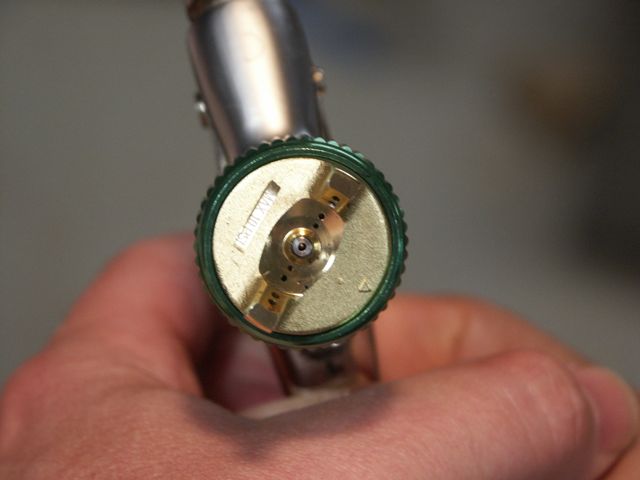
I'm going to try and answer my own question, so you HVLP experts please just let me know if I'm on the right track. After more investigation, it's clear to me now that there's no air mix prior to the end of the orifice so, the needle is simply a throttle and the exact centering of the needle probably isn't essential.
All of the atomization is done my those inner four air jets in the picture above. and as I already knew, the four jets on the wings are for fan control.
Possibly part of the problem is that the trigger also controls air throttle so at small finish throttle, I also get small air throttle. I can crank up the main air pressure and air screw on the gun to increase this though. Am I on the right track?
One more Q - Stew Mac says you can thin USL by up to 15%. Would thinning help atomization through a small orifice? (I recall reading that in HVLP conversion guns, orifice size is for both pattern size and viscosity matching i.e. you have to pick the right size tip for the particular viscosity finish you're using)
Thinning the finish would likely help, but I would put the bigger tip back in. I spray a burst with the same setup and settings that I use for clear coats.
Well, for those following along, I think I've got it but I'm not super duper happy about my answer. I first tried diluting and thinning my colors and spraying through my HVLP but I've got serious atomization problems and, the thing just seems to spit out tons and tons of finish, even at little tiny trigger settings. This is great when spraying clear coats but for my level of skill, I want the thing barely putting any finish when spraying. There's clearly something I don't grok about HVLP spraying.
I've seen bursts done with HVLP guns and they look great so it's obviously the shooter, not the gun that's the issue
When I switched to my old style HP gun, I got much better results and atomization and I had much better control over finish flow. My gun is one of them $20 grizzley specials. Yes, it uses up a lot more finish and yes the room is a gas attack afterward, but it's what I'm going to have to use if I want it to look o.k. in the end. Someday I'll need to figure out how to work that HVLP properly for color. (this is the gun I'm using HERE
Here's a test shot on paper with the HVLP gun. Very small needle setting, air cranked up high.
Here's the same thing with the HP gun. I also found out that with the HP gun, my colors were dilute enough.
And here it is on the test board. There is some spitting visible but that's from the prior sprays with the HVLP gun.
That looks mucho better, Andy!
I have never used an HVLP gun, I use a regular ol' HP gun similar to yours. And after reading this I don't think I want to change!
It sounds like your HVLP rig is just not kickin' the finish out.
I use Target finishes almost exclusively and tint with Transtint (which is what StewMac labels as Colortone). I'd only use pigment if you're trying to rep. a Fender burst, in all other cases I'd use tint. You can get it pretty opaque.
One thing I'd suggest is to add a little amber into the "clear" coats just to warm everything up. USL can exhibit a bluish cast, doesn't always but it can, and the amber counters that. I always do it on warm colors. I also tint sparingly at first, you can always add more but it hard to subtract tint from the mix.
Mark, The HVLP gun does have a big advantage that it gets more finish on the instrument and less in the air. When I sprayed my first instrument with the HP gun in my basement, there was a thick fog of finish in the air after every spray. My booth fan filter and shop filter were completely clogged by the time I was done. With the HVLP, there's no gas cloud at all. My plan is to do the amber and clear with the HVLP since I can get decent coats with the 1.2mm tip and do the black and red with the HP gun since I can't get the control I want with the HVLP.
Johnathan - I think what I'll do is use the pigment in the super black areas and use the tint in the transition area. I too use the transtint (rockler had them on sale for I think around $10 a bottle a few months ago) but ordered the WB black pigment from Stewmac. I've sprayed USL both with amber and totally clear and although at some angles I can see the blue cast, I think I like it better perfectly clear, especially on the top. I use shellac as a seal coat so that does add a little bit of warmth right there.
I'll be spraying color today and if it doesn't look horrible, I'll post some pics.
So far so good!
Oh yeah!