Ed Waliki's copycarver duplicator - anyone built one? [Pictures] - created 06-07-2005
Noble, Roy - 06/07/2005.00:19:02
RNCG, Roy Noble Custom Guitars
I downloaded the plans forEd Waliki's carving machine. Has anyone out there built one? I want to build a machine for acoustic guitar necks.
http://www.copycarver.com/
It really is impressive looking, like a chariot from Ben Hur.
Steve, I think using the V-groove pulleys as wheels and a strip of v-belt as track is a pretty good idea; it's cheap and practical. I'm not sure a rack & pinion arrangement would do any better.
I'm still figuring out the side-to-side motion. I suppose it's worth the price to save time and reward the guys for their ingenuity.
'm still figuring out the side-to-side motion.
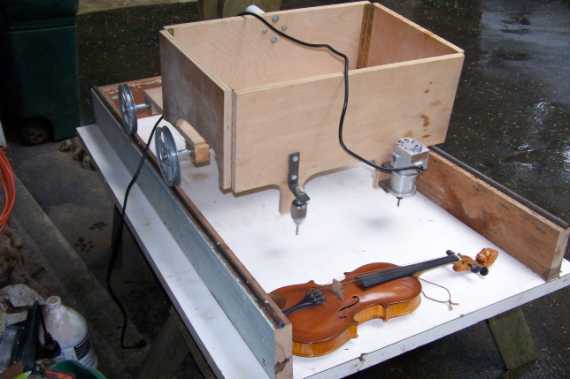
Box. Hinged. From the sides. Simple. Solid. Effective. Well thought-out.
Zoom(the photos) is your friend....
I built one of Ed's carvers several years ago, and have been very pleased with it's performance. Ed has always been more than generous about furnishing upgrade details when they have been developed. So Roy, be sure and hang onto your download code number.
I must admit that I have not made any instrument parts with it, although I now wish I had had it when I was building violins and mandolins even more years ago. However, I have used it to make everything else from model boat hulls, to kayak and canoe paddles, to foundry patterns and found it quite useful and competent. Now that I'm back to building instruments once again, (ukuleles) I've considered using it several times, but so far I haven't built exactly the same thing twice.
I built it a few years back. The plans were fine. I ordered many parts from Manhatten Supply. I used 3/4 poplar ply for the box. The carver worked OK, but not to my satisfaction. I found it to be pretty loose due to sloppiness in the piano hinge that is used on the moving box. I tried to find better quality hinges, but only found "home center grade" stuff.
After I completed the carver, I tried to copy a Les Paul and gave up half way through it, really bummed. That was my experience and there are remnants of it in my basement. I suppose if you are looking for a rough carve, it would serve its purpose. I just was looking for more precision.
Bob-I missed seeing the side-to-side motion at first also. With the 4 corner hinges which hold the swing box together what you have is a parallelogram. I have seen other designs which use this same principal. (see Derry Suther's design in the forum archives)
I am going to ask Ed why the sides of the swing box are so tall.
Also, I'm looking for some heavy-duty precision hinges, might have to make my own.
Marty sorry to hear your disappointment. My experience is/was that the initial roughing out phase was just that ... rough .... then deciding whether to go to progressively finer cutters for more detail and progressively smoother finish, or go to other tools like rasps, sandpaper etc. at which point in the process would be the better option was part of the learning curve for me.
Most of what I have done was, do everything possible on the bandsaw first, (lots less sawdust and time that way) then "duplicarve" rough (big bit=fast removal) then go to other tools. For me, it just wasn't worth the time to scratch around with a 1/4" or smaller bit to try for a smoother finish when other tools could do it just as, or more efficiently.
For me, the neat thing is, the ability to build a pattern from almost anything very quickly and get on with the program. For example a greenland style kayak paddle design with some very specific dimensions and tapers is symmetrical on both sides and both ends. So ONE pattern made with 1/4" plywood pieces fastened to a base to match the required dimensions will duplicate both sides and both ends (4 places with one pattern) very quickly and accurately. In the case of say a ukulele neck I am uncertain, I can rough carve one by hand so quickly that I am not too inclined to mess with a duplicarver. However I personally would positively consider roughing out say a violin top or back. I can't speak for a solid body having never done one of those...
Here is a picture of me using just double stick tape to hold each neck down, it works great that way, but I now use jigs to be more precise with setup. I was using it to duplicate a neck contour in this picture.

OK Deb ... Here it is with a violin for scale, (it's not small, but it stores pretty well)It can also be scaled up or down to suit.
As for the hinges, I used pretty standard hardware variety, and ridgitiy hasn't been an issue so far. I think that may be why the "box" is so tall.
Ed has also gone to larger "wheels" on hia current design.
Roy(and others) there are full ball bearing hinges available for heavy doors. These are the ones that you would need for a good, acurate machine.
Hmm, a 'cowcatcher' brush or two would help keep the tracks clear, but I think a dust shroud for the router bit or the entire cutting area would be much better. As is, it looks like that thing puts a huge amount of dust & chips into the air in a very short time, and with some wood species this could be hazardous.
I emailed Ed lasty night to ask him why the swing box is so tall. Here's what he wrote me this morning:
For stability in the corners. DON'T shorten it or it wont work. If you shorten it the swing box will flex under the weight of the router and move while carving killing the accuracy of the design. If anything make it taller to make better.
Ed
Just an idea, since I have not built one, but the design could be lightened by an open lattice design on the box. I agree with needing the height to maintain stability and avoid flexing.
Steve, my first thought when I saw it was that's I'd likely toss a couple sand bags in it to add mass. This is a place where mass is you friend. It absorbs vibration, steadies the cutter, etc... You counter balance it with equal mass from the other side, and that is simple to do.
As Mario said about sandbagging, so I thought too. And I would keep the solid tall panels.
On other little things:
In another of the pics on the website that shows the router's mounting U-bolts, I noticed that there appear to be drywall anchors that are used to cover the ends of the U-bolts. Odd. I'd cut them flush to a nylon stopnut or use an acorn nut with Loctite to cover the bolt ends.
I wouldn't use lead to cast the stylus because of the small but easily avoidable risk of poisoning. I'd try casting it in some other material, e.g. Bondo, after coating the form with a release agent such as oil or soap.
As far as the stylus was concerned, I opted out of the drill chuck and angle iron, and made a hardwood block with a rounded hardwood dowel protruding out of the bottom. A thumbscrew held the dowel in place and allowed for adjustability. That worked out nicely. There wasn't any flex that way in the stylus.
Marty, I think that the use of the angle iron and drill chuck is meant to ease the construction of the fixture, but I agree with you that a different mount for the stylus might be better. If I build one, I'll use the drillchuck, but I'll use/make a much stiffer bracket to attach it.
So here's some more thoughts to add to this thread, Matt might (or not) agree.
The issue of chips on the rails doesn't seem to be a problem, because the pulleys contact on the upper sides of the rails not the rail's top.
There is a pretty significant counterweight already in the design to balance the machine for almost fingertip operation. This seems to be adequate damping (for me) but there is always room for improvements to suit individual tastes.
The chuck (as a follower holder) is pretty handy because it accurately centers any diameter follower shank that is inserted. So that stepping down to say a 1/8" router bit doesn't require anything more fancy than a 1/8" drill rod, which now remains exactly centered to the new router bit.
I must sound like mister super sales for Ed, but having designed and built many machines for most of my career, I really appreciate the utter simplicity and competence of this design. If a basic, easy to build, duplicating carver is what is desired, this one seems pretty good.
I think this thing used to be called a Duplicarver which as been discussed several times on the forum. Do a library search. I guess he had to change the name.
I'd forgotten about that one. The ones I remembered were like David Myka's:
Roy from my own experiments, I've always aligned the neck as the above photo shows. You move it side to side following the template neck with your stylus. Then you move the stylus up to the next section of the neck by pulling or pushing a slight bit to move the carriage back or forth the railway, depending on which way your working. It's not that hard, the only thing is that you must get it aligned correctly before doing any work with it. That's a must!!! Otherwise the center of the neck might not carve center on the other neck, which isn't a good thing. I know, I've done it before.. :(
The dust on the rails doesn't make a difference since the wheels have space under them as describedd earlier, so I've never had an issue with that before. I just use my shop vac to clean it up after each carving is completed. I do want a dust collection system connected to it at some time in the future, but for now I don't have time. One thing that people need to understand is that it's just going to get you there quicker, but you will still need to hand sand some. I personally use the 3/4" round nose bit which seems to work great on curved carvings. Once you have everything setup with jigs, it's so easy to duplicate your guitars you have built by hand. It's not going to finish the guitar for you, it's only going to make carving a bit fast and more accurate. Which is all I use it for.
I think you could make precision hinges by removing the hinge pin, running a taper pin reamer through the hole and using precision ground taper pins for the hinge pins.
Hi,
Skip
There is a long continuous hinge that is mounted to the swing box and connects horizontally to the trolley. You can see the flat surface that the axles and pulleys are attached to. That horizontal hinge allows the swing box to move in an up and down motion as well as the left to right movements of the swing box itself.
I fired it up yesterday and it seems do pretty good for the center of the neck but it cuts too deep near the fingerboard. I'm using the drill chuck method for the stylus, and I think it needs to be more rigid.
I'm using a 1" round end bit, and you could make the stylus out of a 1" bearing ball, but I don't know where to find one. I've seen balls with a threaded hole partway through. Anybody know where to get one?
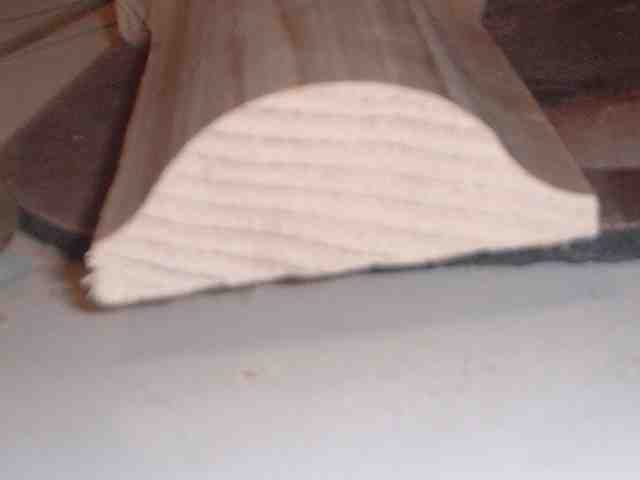
Wooden toy suppliers for woodworkers make wooden balls of different diameters. You may want to consider that instead of a ball bearing. Check out the picture of my stylus holder in the thread that Deb referred to earlier in this thread. You could take a 1" birch dowel and round over the end like a broom handle.
Roy,
King Architectural Metals in Texas has threaded 1" balls for about the cost of a newspaper. On their web site (obvious site address)check all of the pages for "balls", they're in there somewhere. No minimum order and they ship cheaply. My last small ($20) order was delivered to me in Massachusetts in less than 72 hours. Good luck.
I decided to use the parallel idea, using steel shafts and bearings instead of hinges. I know it will make the side-to- side motion easier.
This looks good but it's too sloppy. Maybe the top and bottom bars need to be further apart.
I'm starting to think hinges again.

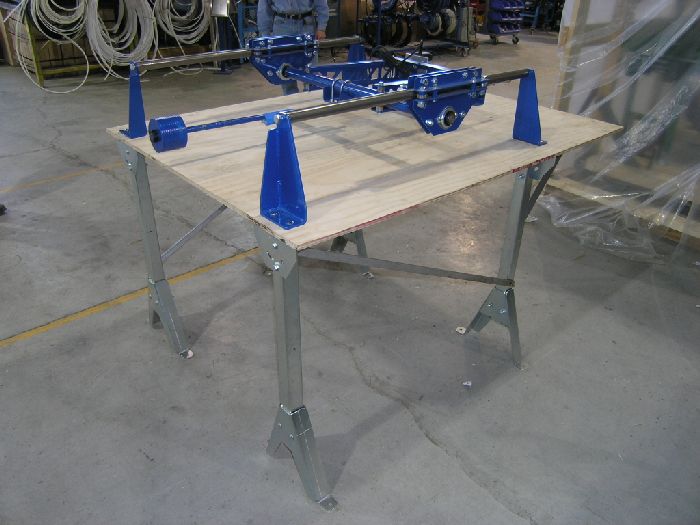
I purchased a set of plans from Ed but decided to not build his duplicator as it appeared to flimsy and heavy, so I designed my own dupilcator. I'm building from a wheelchair with only my right hand due to a motorcycle accident 3 years ago, so the machine had to be light and balanced to permit one handed operation. On the plus side I own a fabrication company which gives me full access to a 3500 watt laser cutter and cnc press brakes. The photos show what I came up with. It works great, and I now plan to build a smaller unit to do inlay work with. If anyone is interested I could post the Cad drawings of the machine in the photo.
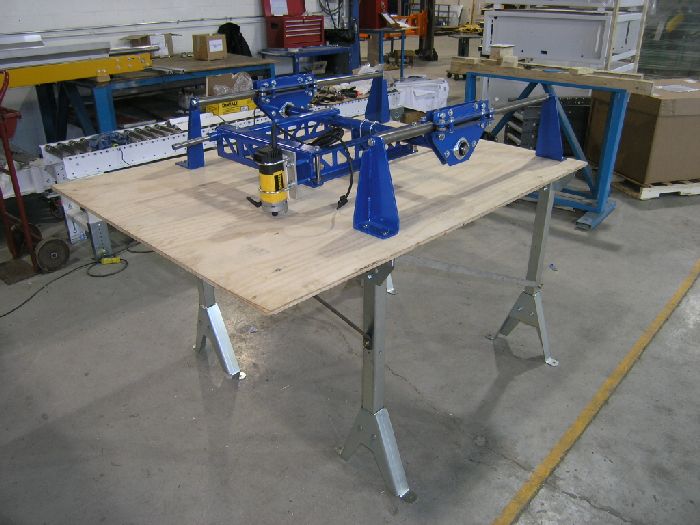
Here's a back view of the machine
Bill Rickard
I decided to make the box 8 by 8 inches. This way I can use two 4" door hinges on each corner. I found a trick to improve the hinges. first I ran a 1/4" reamer through the hole and then used a piece of precision ground 1/4"shaft for the hinge pin. This makes the hinges really tight.