Clay Schaeffer's photo-essay on making simple abalone rosettes [Pictures] - created 11-15-2009
Schaeffer, Clay - 11/15/2009.18:38:20
I have been making some simple abalone ring rosettes using a belt sander and a laminate trimmer. This may be "Old Hat" for most of you, but if anyone is interested I will describe the process.
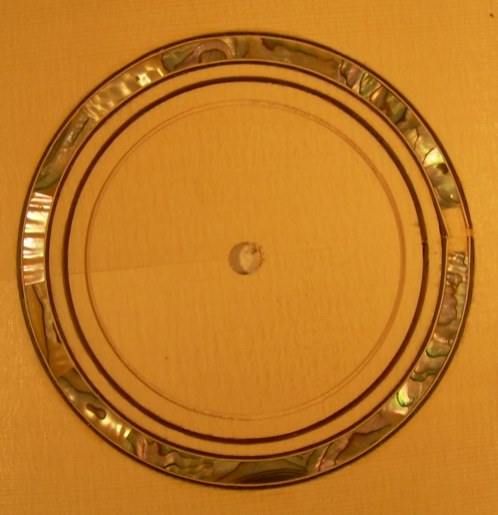
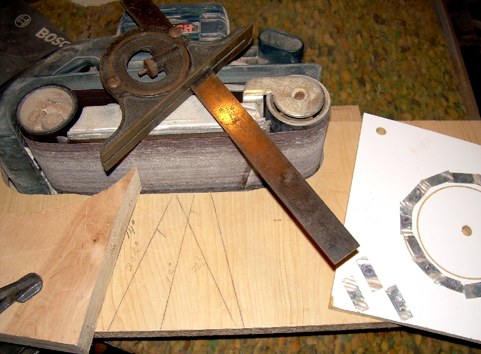
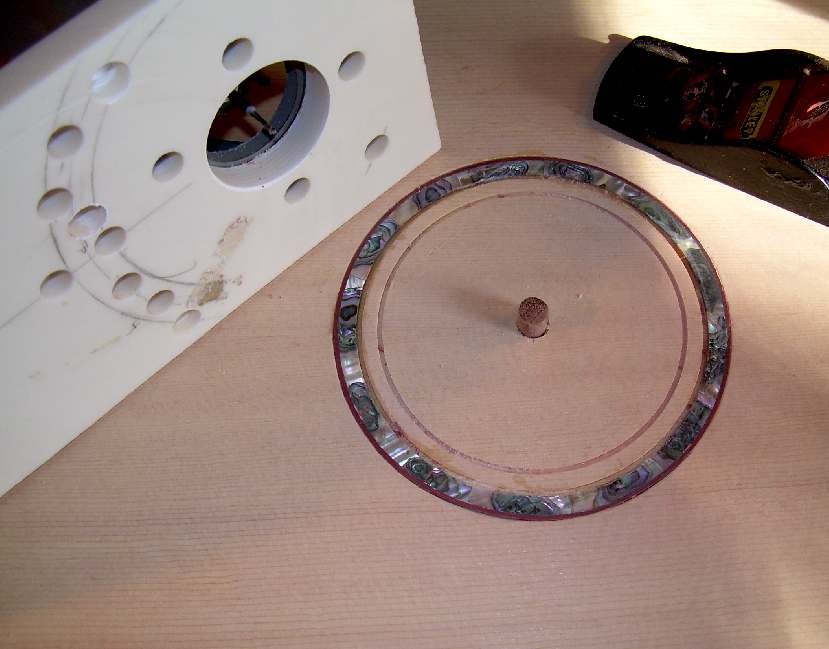
This first picture shows the trim router with a circle cutting base, 1/8th inch collet adapter and a dental burr bit. The router is resting on a board with a dowel in it that fits into the holes in the base of the router. A small "work board" is on top of the dowel and the sound hole (inner circle) and the shell circle outlines have been routed into it.
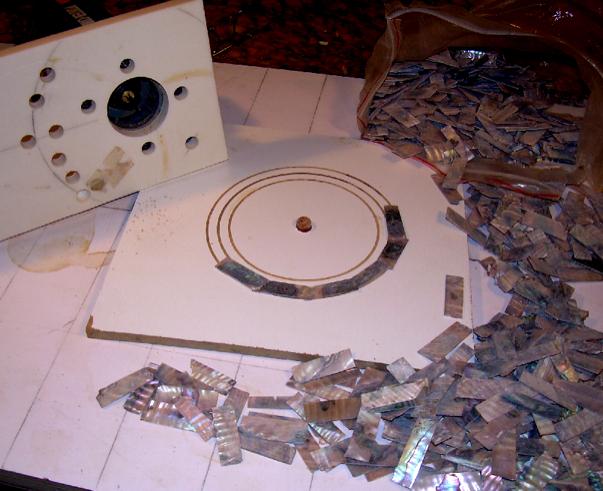
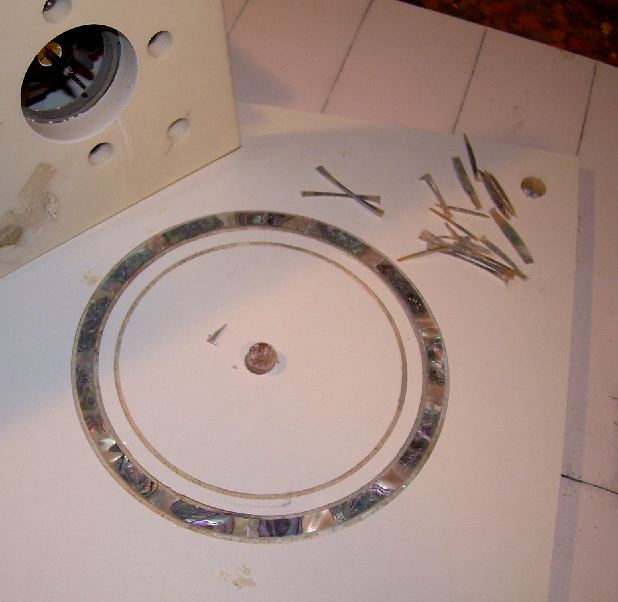
The shell I am using is scrap that is sold by the kilo rather than by the ounce. The pieces are relatively small and some have defects, but they are cheap and work fine for this. It is solid shell, not ablam.
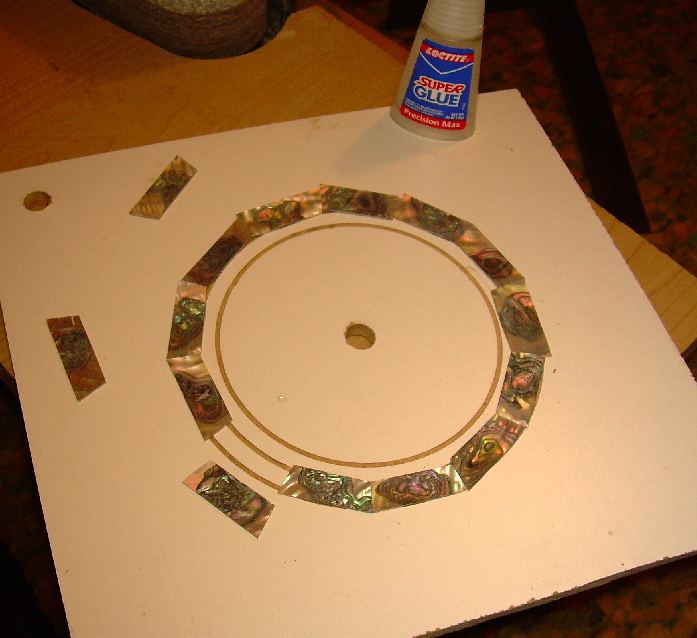
The shell pieces are selected and laid around the circle, overlapping each other to estimate how many pieces will be required.
Counting the number of "joints" between the pieces, doubling that then dividing that number into 360 will give you the approximate angle you need to grind on each end of each piece. (I miscalculated
The jig for the beltsander has the angle transfered to it and a block of wood clamped to the line
The shell is held against the block and moved to the sanding belt. After one side is sanded the piece is flipped over and the other end is sanded. Dust collection is not a bad idea.
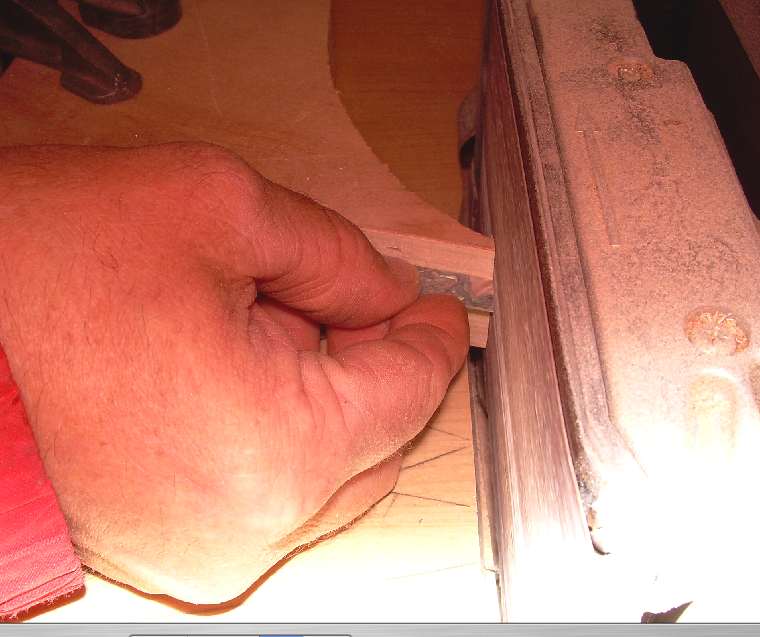
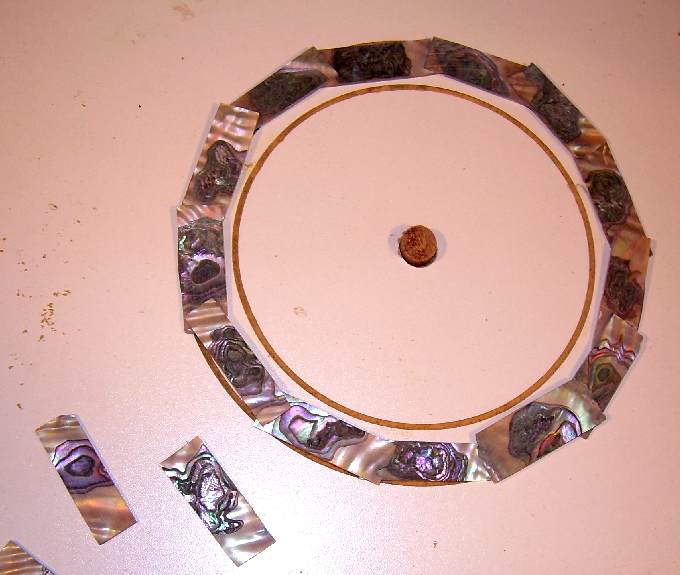
If you did your calculations and layout right you can put a little tic mark on the jig and sand all the pieces to the same length. This is not necessary if you don't mind compensating the end angles if you get off a little.
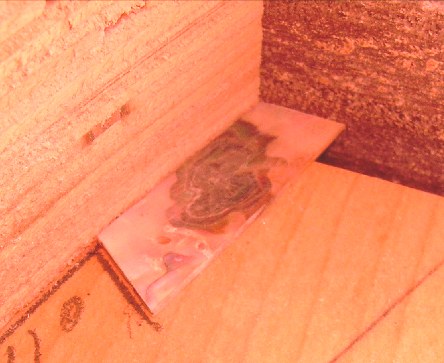
The shell pieces can be fitted around the workboard as they are ground and tacked in place with CA or contact cement. Be sure you have the necessary solvent to release them. For a complete circle you will have to fit the last piece like fitting a keystone. Grinding and fitting the whole circle took about 10 minutes.
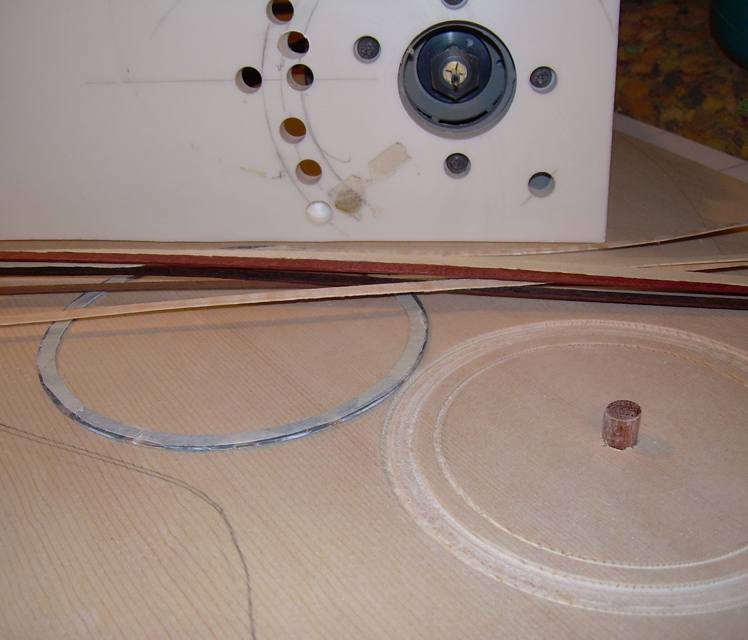
With the shell glued in place the workboard is placed over the dowel and the router is used to cut the edges using the original settings.
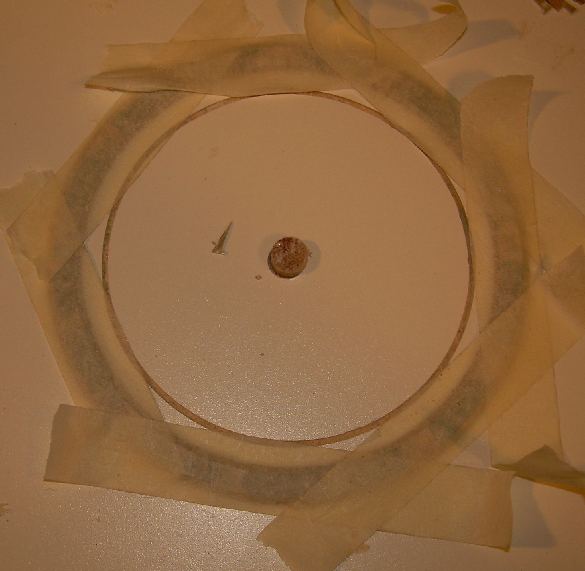
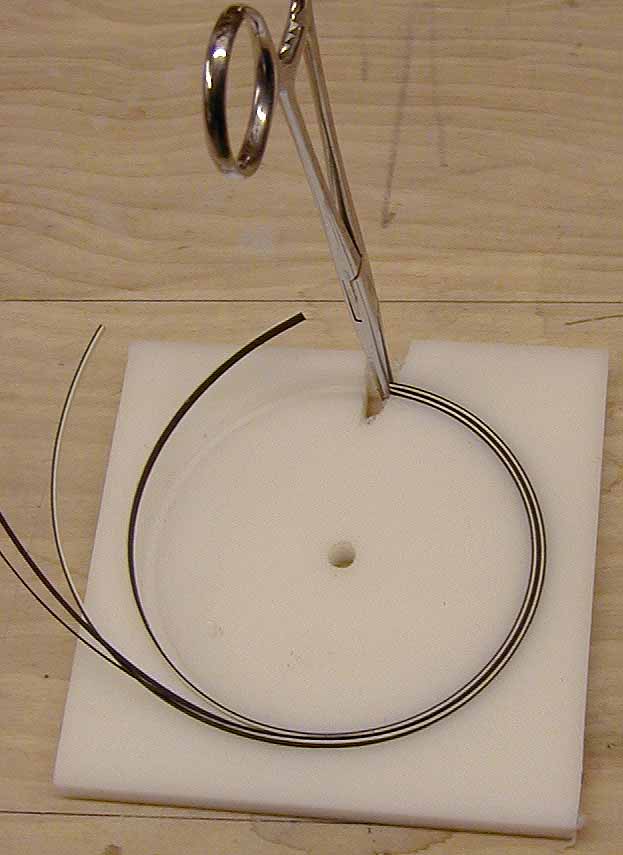
Tape is placed over the shell to keep the pieces in sequence and hold the ring together.
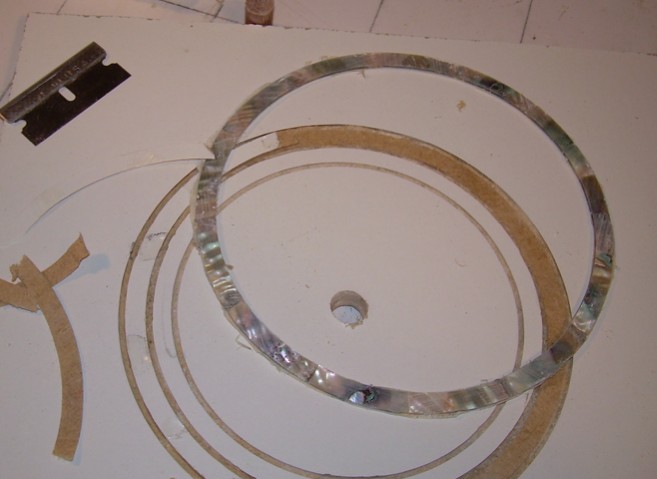
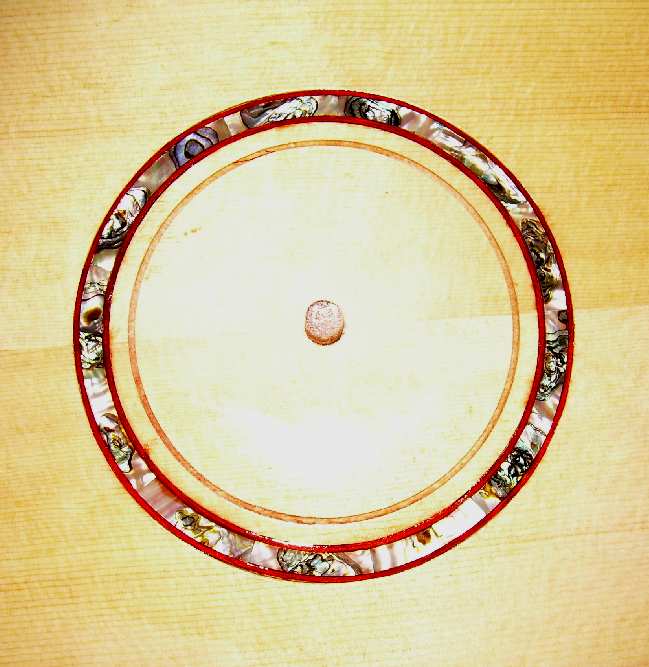
The Tape is trimmed and the rosette is released from the glue with solvents and/or razor blade. This one gave a bit of trouble, but making a new work board only takes a minute.
Excellent job Clay. I'll be giving this a try.
Thanks for showing how you do this.
Clay,
As an aside, shell is nasty stuff. I highly recommend a good mask.
Hi Charles,
Usually the little workboard survives. If I had used contact glue (spray 90) I could have loosened it from the melamine with a little lacquer thinner. But the paper between sounds like a good idea.
In the next day or two i will try to take some pictures of inlaying the shell and banding into a soundboard.
Nice job Clay. Thanks for posting this. I think that I will use a dremel, but otherwise follow your lead. How is the belt sander held in place? For me it looks like an out-door kind of job, and a mask is absolutly a must.
Thanks Clay, thats how I just did a wooden rosette. Didn't think about trying it on abalone too. Now all I need is a bag of scraps :)
Steven, I was just going to ask if that procedure would work with wood. Any tricks?
Hugh, this was the first time I did it but it was pretty straightforward. I think I got most of this method from Todd Stock. I took a few photos and could post them if my explanation isn't clear enough.
I made my wedges from Myrtle burl sliced in 1"x 0.1" strips. I ran them through the thickness sander to clean them up so they ended up about 0.09". I made a miniature miter box to cut the wedges. The wedges need to be the same size and the angle needs to be right. After I cut my wedges I used a small clamp to hold them all together like a deck of cards and evened them out on the disk sander. I glued the wedges together with 0.030" bwb purfling between them freehand with CA and accelerator on waxpaper. That worked ok but next time I'll use some scrap wood underneath the wax paper and use push pins to hold it all together like I used to do when I built wooden models.
After the pieces where all glued together I used doublestick tape to put it on a piece of scrap 1/2" plywood about 10"x18". I ran the plywood through the thickness sander first to even it out. After attaching the rough rosette to the plywood I ran it through the thickness sander taking very light passes just enough to flatten the top side.
I figured out where the center was for the pivot hole and used my laminate trimmer circle-cutter (Wells-Karol type) with a 1/8" downcut bit to cut out the rosette.
Finally I used Naptha and a small, thin artist's spatula to gently remove the ring from the plywood.
I finished up the rosette this morning. The first thing I did was layout the outline of the top and where I wanted the soundhole to be. Then I drilled a hole in the center of the soundhole and put the top over the dowel in the work board. Using the original settings used to cut out the abalone I routed two circles in the top. I routed them slightly deeper than the thickness of the shell. These routs are used for the wood banding around the shell. I then set the router to the depth of the thickness of the shell. I routed out the area between the lines where the shell will go.
I decided to use a single perfle and selected a piece of bloodwood for this purpose. I bent it with a heat gun and inserted it in the outer groove. I am thinking I will end the fingerboard above the rosette so I spliced the wood rather than butted it. I tacked it in place with CA. I then fitted the shell against it . It was a little too tight because the wood wasn't a perfect fit, so I took one piece out of the ring then fitted the remaining pieces against the wood and glued them in place with CA. The "missing link" I trimmed to size and replaced where it should go. I then planed the wood perfle flush to the top and ran the router back around the inner groove to to eliminate any overhanging shell.
Then I added the inside wood purfle to finish off the rosette. I wicked in CA glue from the shell side to try to avoid getting it on the top. I have heard CA can discolor the top but have not experienced this myself. I planed the wood flush, then sanded the whole rosette.
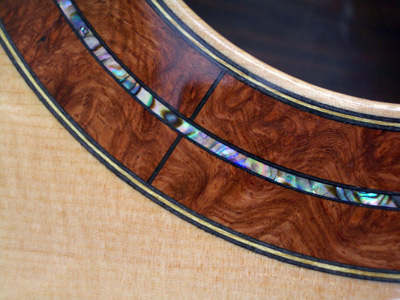
The shell pieces I selected had colorful centers and mother of pearl like edges. I think the alternation of these features draws the eye away from the joints.
Hi Rick,
Hi Steven,
I would be interested in seeing some pictures of how you did your wood rosettes. If it is O.K. with the Sysop, perhaps they could be added to this discussion and the title changed to reflect that.
Clay, am I seeing gaps around the outer purfling in that last photo?
Hi Barry,
A water based glue will swell wood or fiber purflings some which will help close up those gaps. CA should only be used when you have a perfect fit.
I install rosettes in much the same way- except I route the area for just the main inner ring first, and glue it in with no purfling at all. Then I make up my purfling and using a router bit matched in size I then route the inner and the outer channel for it, following the edges of the inner ring all the way around. Then I bend up the purfling and use wood glue to glue it in. This gives me the best fit that I can get.
Clay, I really like the way the abalone came out. As far as the wood rosette goes, I'll take a few more photos then post what I did in another discussion. I probably won't be able to get to it till Mon. Perhaps others can jump in with some of their methods too. I've got two more to do for this batch and could use the ideas:)
Hi Barry and Mark,
Thanks for the tips on doing the wood banding. I will have to give them a try.
Hi Steven,
I look forward to your posting. I have some burl veneers that might make nice rosettes.
Id like to offer some variations on the above techniques that have simplified building rosettes for me. It offers the freedom of juggling pieces around to your hearts content, prevents rosette wood from staining the top wood, ends up with a finished rosette that fits exactly, and allows leveling the final rosette, all without exposing your top to dings, scrapes and other abuse that always caused me problems when I tried to work using the top itself.
I start from the center and work outward and inward, just as Mark describes. (If you are making several identical rosettes, I found it easier to make up a block of the inner portion, and slice off rings, otherwise individual pieces can be built up as Clay has done

The difference is I do all the rosette building in a false top of polyethylene (plastic cutting boards work nicely for this)
I cut a trough in the plastic, and cut the same trough in the real top. I then doing any playing around with pieces that I need to do in the plastic. Once the pieces ar arranged exactly how I want, I flood the trough with thin CA to lock it in. This also impregnates the pieces of wood and locks in any pigment that otherwise may bleed out into adjacent wood.
Then, as Mark does, I cut whatever inner and outer bands for inner and outer borders I need with a bit matched to the border thicknesses, remembering to cut the real top with these same radiuses at the same, time so they are identical to the ones cut in the plastic. The borders bands are then fitted into the plastic troughs and flooded with CA.
The picture is of just a banded ring, but will show what I mean.
Once the entire rosette is glued up, I can level it by running it through the drum sander, use a file, or a block and sandpaper. Once leveled, I cut a small wedge into the plastic and rosette and, using this space to access the bottom of the rosette, pop the whole thing right out as the CA doesnt stick to the plastic.
I press the rosette back into the trough upside down and level the bottom face. Then I pick which whichever face looks the best, and because the troughs in the top were cut with the exact same radii as the plastic, the completed rosette fits the top like a glove.
If you take a close look at the borders of the rosette and the top wood you can see how this results in a pretty good fit.
I always paint the trough in the top with shellac first to prevent CA running into the grain and staining the top, and once the rosette is pressed in and level, wick thin CA to glue it to the top.